Hello, everyone!
I’m Ginger from Ginger Snap Crafts, and, let me tell YOU, I am so excited to be at Lil’ Luna today.
Kristyn is an amazingly talented lady, LOVE, LOVE, LOVE her blog, & I am truly honored to be here! Yay!
Over on my blog, I LOVE sharing cute, simple & easy crafts.
When you see one of my projects, I want you to say, “Yes! I can do that (& I can do it even better!)” 😉
I hope to share fun ideas that inspire YOU to create along with me.
Today I’d love to show you how to make
these super fun & versatile
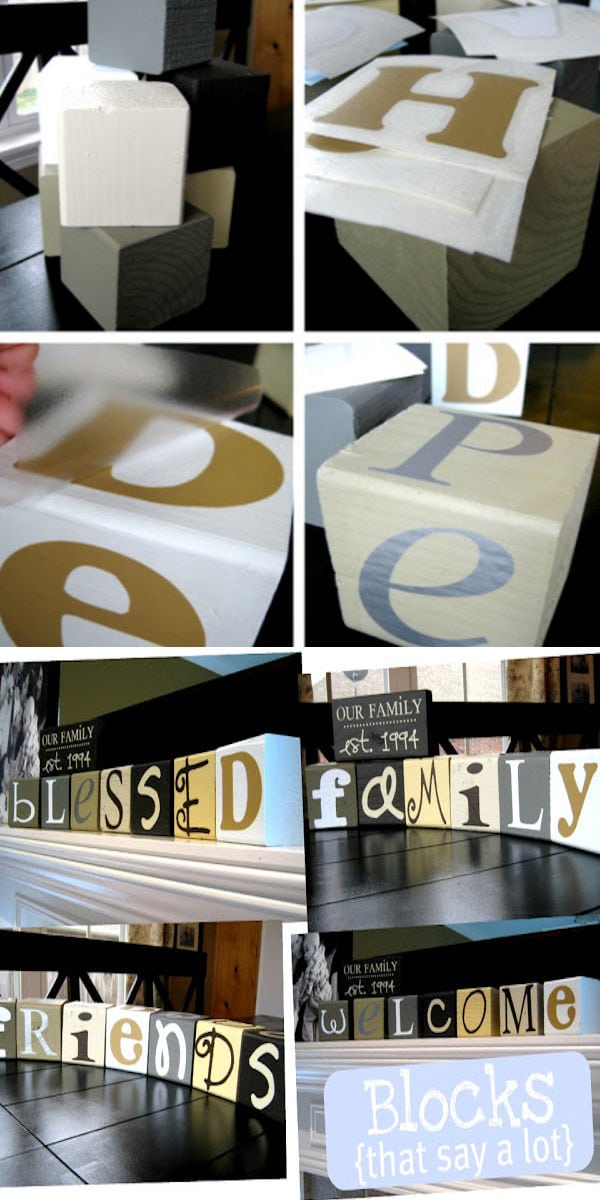
blocks {that say a lot}.
From these 7 blocks with 4 letters on each one
you can make 15+ seasonal words!!
(I originally got the idea to make these from here.)
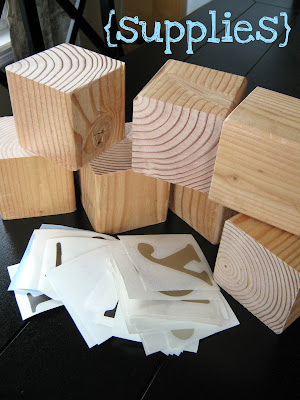
You’ll need the following supplies:
a 4×4 cut into 7 square blocks
(You can buy 4×4’s at
Home Depot or Lowes.)
paint & paint brushes
sand paper
*vinyl lettering
*For my vinyl lettering I used a few of my favorite fonts.
I wanted my blocks to be mismatched & kind of fun. 🙂
FYI: I used a different font on each block.
Fonts I used:
cafe rojo, hula skirt, ck chemistry, elise,
fontmoochers, high tower text, impervious
(All these fonts are free,
just search for them online
& they should be really easy to find.)

I slightly sanded my blocks,
and then I painted them.
FYI: I also painted each block a different color.
Thought they’d look cute like that. 🙂
Then I let the paint dry,
and then I applied the vinyl lettering.
For more detailed vinyl lettering instructions you can go here.
BLOCK 1- H, Y, E, D
BLOCK 2- A, C, R, S
BLOCK 3- R, P, E, T
BLOCK 4- V, N, L, O
BLOCK 5- E, O, M, D
BLOCK 6- S, M, K, I
BLOCK 7- T, F, B, W
That’s it! Super cute & easy! 🙂

Here are some of the words you can spell:
Family
Blessed
Snow
Home
Harvest
Spooky
Winter
Mother
Dream
Easter
Freedom
Welcome
Friends
Faith
Hope
Monster
Can you think of any others??? 🙂
& I’ll be sharing the tutorial on how to
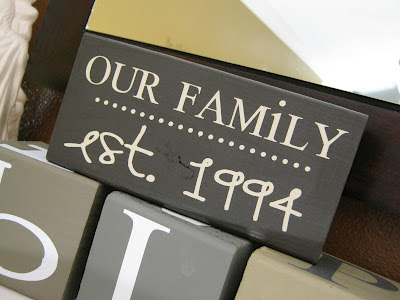
make this easy {established block}
to go along with my new seasonal blocks.
They look really cute together! 🙂
Thank you so much for having me over, Kristyn!
——————————-
Such a great idea!! Love all the words you can come up with.
Be sure to go on over to Ginger Snap Crafts to see all the lovely projects Ginger has made.
For more great DIY crafts be sure to check out:
For all DIY projects go HERE.
For all Crafts & Tutorials go HERE.
ENJOY!!

Gorgeous, pinning!
So cute, huh?!
These turned out so cute. Every time I see something like this, it makes me think, “I NEED to do this!”
Ginger did such a great job. I just love that they can be out all year long, and that you can change them whenever you want!!
These are so cute! I am all about blocks and vinyl lettering!! Thanks so much for sharing!
{PS} I love Ginger’s Blog! She is awesome!!
Isn’t she?! Such a great idea that would be perfect for a girls night in craft night! 🙂
Very cute Ginger! I finally got some vinyl and now I need to try it out!
Love this project! Many thanks for sharing.. pinning too 🙂
I love the versatility of the blocks!
I know!! So clever, right?! Ginger did a FAB job! 🙂
I LOVE LOVE your blog! Thanks for the great ideas!
I LOVE hearing that, Kristine! Thank you for stopping by, and I hope you come back again often. 🙂
Where do you get vinyl letters? do you make them yourself of buy them…any store suggestions?
I am wondering what size the letters are? I love this and can’t wait to try it.
Do you know of a place that will custom make the vinyl lettering for you?
My sister and I just did these block this weekend. We loved them. Thank you so much!
So what size do the blocks turn out to be when finished? They’re really cute!
I made the blocks last night and mod podged letters on the blocks. I really like the vinyl letters and am looking at a cricut, I like how the mod podged letters came out for my first set. love the idea and all the words I can make with them.
Out of curiosity, is there a reason that you only put the letters on 4 of the 6 faces of the blocks? Thanks!
I think because the cut sides don’t have rounded edges, so they would look a bit off…
Maybe so–thanks! 🙂
Great Idea was wondering if after you put on the letters….did you seal the paint with something or just leave it flat?
where do you get or how do you make the vinyl letters?
Where do you get vinyl letters, or how do you make vinyl letters?
You can make them with machines like the Cricut or Silhouette (available at all craft stores). Or you can find someone local who sells vinyl. There are also lots of people on etsy who do it. 🙂
If you add an 8th block with an S, V, L, and J you can then create Believe, Joy, Thanks, and Christ . At least. I’m sure there are more.
You can also get Noel out of the existing blocks
Yes – good catch!!
No you can’t. N and L are on the same block. The 2nd S in blessed is upside down.
These look amazing! I bought blocks today from hobby lobby as well as all the supplies. However I bought stencils for the letters because I don’t know where or how to get the vinyl letters. Can anyone help me out?
I don’t know if you found a place to your vinyl letters from but I make and sell them from my face book page. https://www.facebook.com/WillisHalfDozen you can message me on there for info.
I just did a similar post! I created some Easter blocks! I really like your idea here and how you can change up the words!
Did you use treated 4×4’s? I can’t find untreated 4×4 wood. Super cute!!!
i found a few more words….earth, heart, deer, and storms? not necessarily holiday words but if you like to change it up every so often then these might help a lil?
I love this! Where do you find vinal lettering?
Hi Casey! You can order custom vinyl lettering from tons of places, but I would search etsy.com. There are many sellers are there who sell it. 😉
You can also write “merry”
The word LOVE
believe is another word 🙂
Where do we get the vinyl letters? Do you have a special machine to cut them? Its pretty vague on how to go about this part, thanks.
Did you use treated wood? If so, how long did you let it dry before painting?
First: awesome idea and tutorial! I added letters to the 2 empty sides on each block. I’ll list them in a second. We can now spell: Advent, Angels, Lent, Spring, Showers, Summer, America, School, Pool, Leaves, and Haunted. Here’s what I did: block 1- M and G block 2- U and Y block 3- N and S block 4- U and A block 5- R and A block 6- E and O block 7- L and I
Advent, leaves, pool, showers, school and lent can all be done if you have the 8’th block as well, if the extra sides haven’t been “lettered”. I DO wish there was a G though. That’s certainly a limitation factor! 🙂
where did you get the letters for the 8th block ?
Question.Did you buy a 4×4 post that was pressure treated? I could not find any that were not pressure treated. The process of drying them out was so annoying.
What size font did you use for the 4×4 blocks?
Question for you. I have been making wooden block signs since I got my cricut. I paint the blocks. When dry I attach the letters. I then modge podge over the vinyl letter. I have had trouble with some letters puckering up (sticking up in some spots) and all I can do is redo that block. Do you have any ideas what I am doing wrong?
Hope to do this project of yours but want to figure out what I am doing wrong first.
Thank you for any help you can give me.
You shouldn’t modge podge over the vinyl it needs to breath
I discovered that you can spell out Liberty. Perfect for the 4th of July.
Awesome! Thank you!!
Love this! What do you use for your vinyl lettering?
I use a Silhouette or Cricut but you can get custom vinyl from many etsy shops on etsy. com 😉
I made these and I Iove them! I had two extra blocks so I added vinyl shapes that matches some of the sayings. Thank you!
Okay, if you use the same fonts, then the light grey “n” can be turned upside down to use as a “u”. This also opens up new words. I have had these for a year now, so I have a few other words I have made (I made the optional eighth block)
– Rest
– restful
– renew
– rum
– mum
– mother
– father
– risen
– alive
– cross
– life
– saved
– Jesus
– plyable (not inspirational but doable lol)
– storm
– moose (my husband and I play scrabble with them sometimes lol)
– today
– wonder
– summer
– roads
– new
– fate
– bells
– jump
– hump (depends where you keep them I guess lol)
– lets do it (again… Location is key lol)
– wield
– best man
– money
– come
Love this idea. You can spell FIDDLER, FIDDLE & FIDDLES! This is an added bonus for fiddlers like me. Thanks for posting the directions, I’ve made a snowman with 4×4’s and have some extra pieces. Also SNOWY – HEART – BRAVE – SMILE
Just wondering if you know the paint names you used. I know it’s been awhile 🙂
Unfortunately, I do not but if you would like to contact Ginger from Gingersnap Crafts, she may know. 😉 http://www.gingersnapcrafts.com/
Did you treat the painted blocks with a spray varnish or something before attaching the letters?
You don’t have to, but you could spray a clear coat on there. I like to spray a polyurethane on a lot of my wood crafts. Hope that helps!!
Is there any chance you know which fonts you used for which blocks? I downloaded the fonts you suggested, and printed them out but can’t seem to figure them all out from your photos. Love this project, by the way!
Thanks,
Barb
This was from a contributor a few years ago, but this is what the post said…cafe rojo, hula skirt, ck chemistry, elise,
fontmoochers, high tower text, impervious
(All these fonts are free,
just search for them online
& they should be really easy to find.) Hope these help!! Thank you!
Another word to make with the blocks: Slante (Irish toast for St. Patrick’s Day))
Thanks so much for sharing that!!
Did you seal the blocks after you applied the letters
I don’t think I did, but you definitely can. It would help for sure!