Are you ready for summer?!
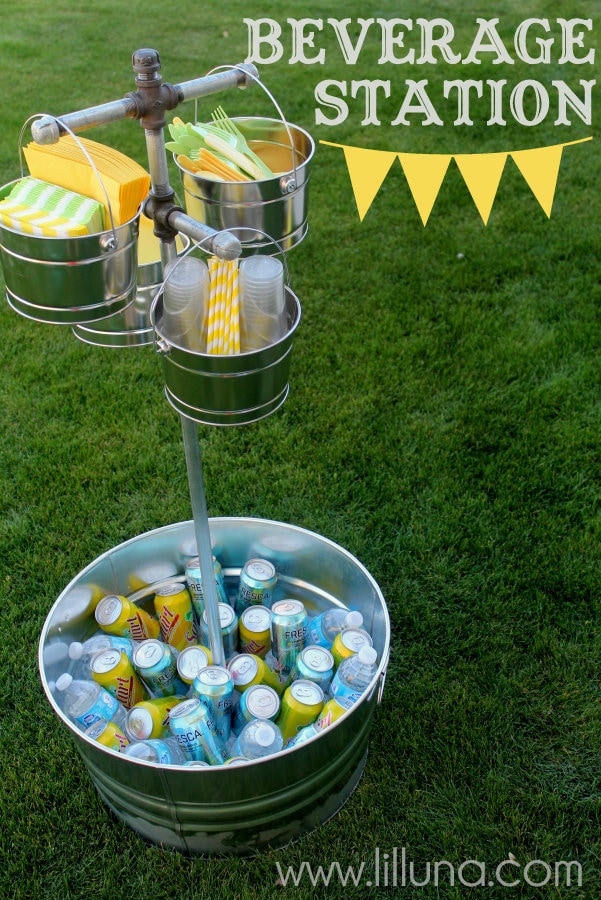
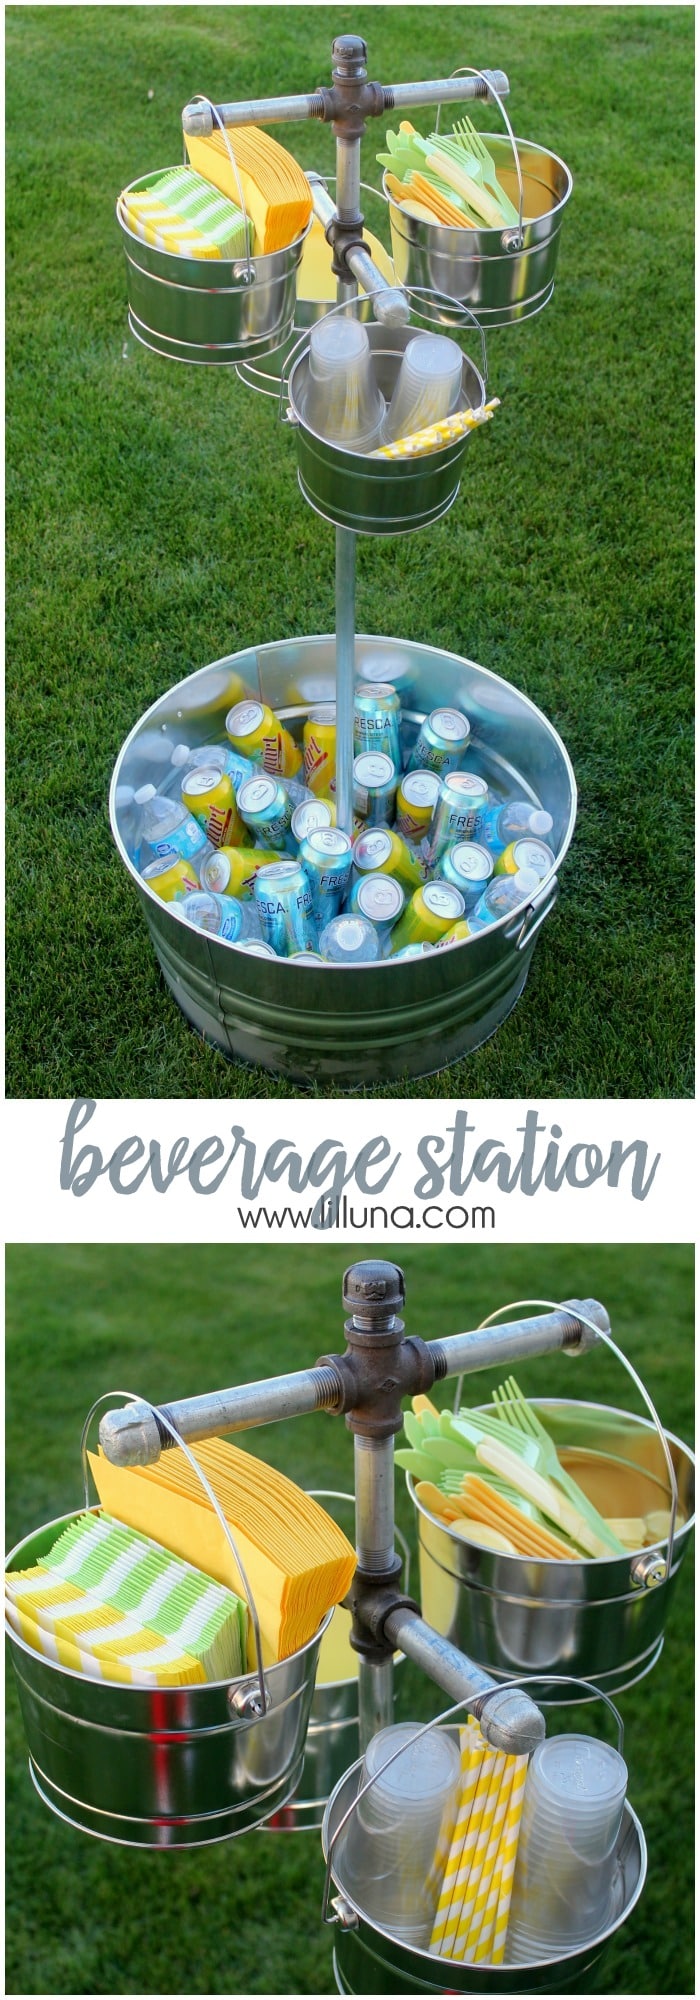
With it warming up and kids getting out of school, it’s time to think of the Outdoors. That’s right – this month’s Lowe’s challenge centered around several topics, including Outdoor Party Decor. The hubby and I worked together to come up with this next idea and decided a Beverage Station would be perfect. This is what we came up with:
Pretty awesome, right?! When the hubby and I work together we can usually do some amazing things, and I’m glad I had his assistance on this one. I mapped it out in my head and the hubby knew the exact parts that would make it work. We ended up in the plumbing section for most of the parts, but what was great about this project was that we were able to put it together in about 10 minutes. Sweet, right?
Here is what you’ll need…
SUPPLIES:
- Beverage Tub
- Pails
- Galvanized Pipes (Lowe’s)
- Galvanized Connectors (Lowe’s)
- Galvanized End Caps (Lowe’s)
- J-B Weld
DIRECTIONS:

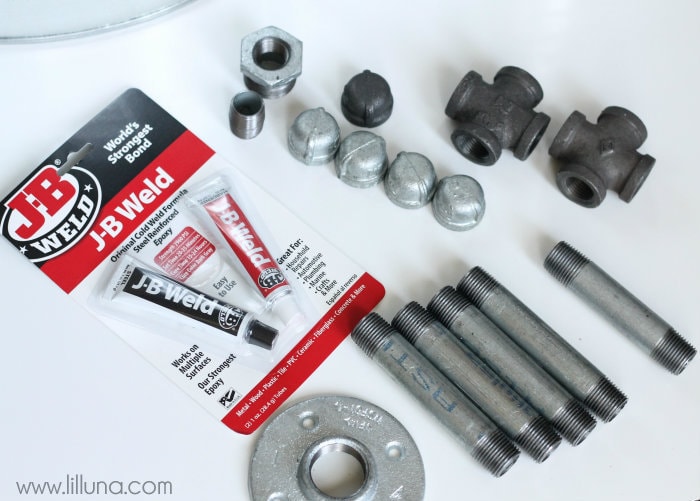
1. Gather your supplies.
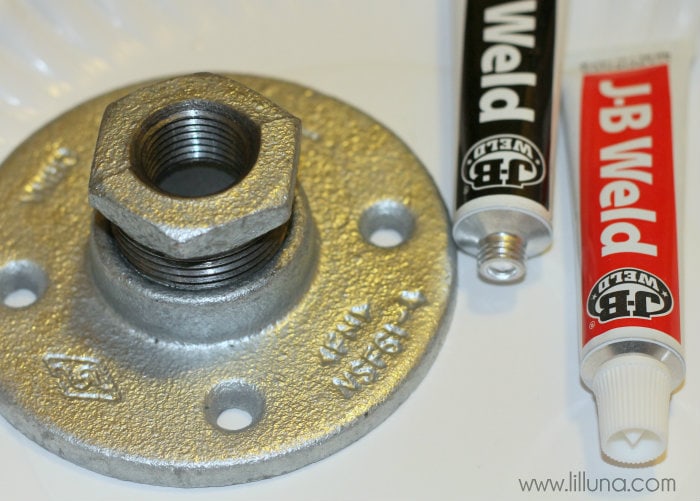
2. We used Original J-B Weld to glue this piece to the bottom center of the large bucket. Before we glued it we cleaned both surfaces and lightly sanded it just to rough up the surface (Refer to the J-B Weld instructions on the back for more clarification and tips). We used this connector piece to put in a large piece of pipe where the smaller buckets would hang off of. We let this dry overnight.
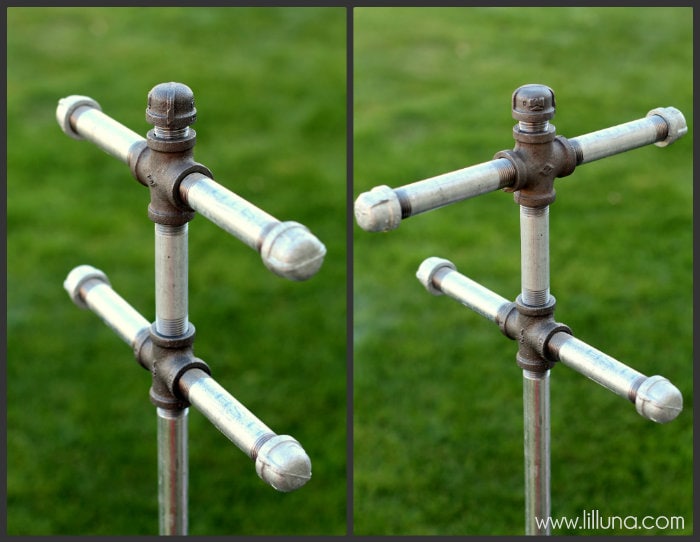
{This is also easy to put away! Just unscrew the bottom pipe from the bucket and twist the pipes so they are the same direction to put away!}
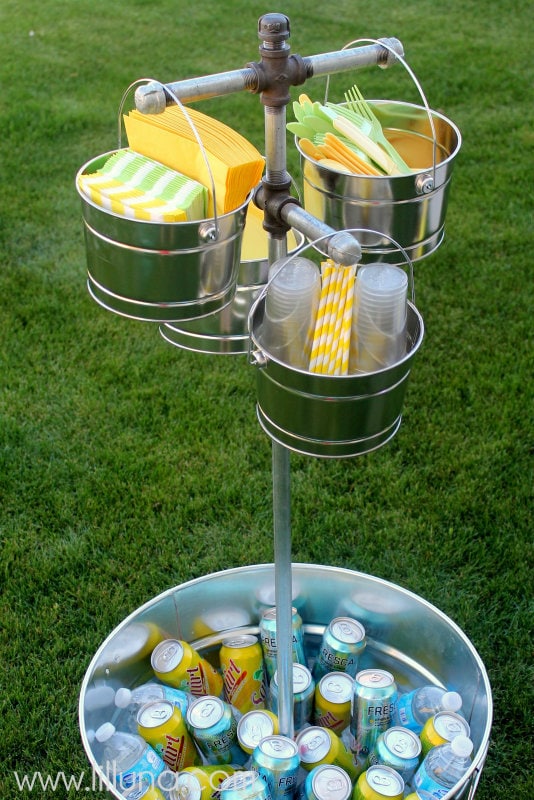
3. From there we connected all the pieces we had. Depending on what height and the length you want each piece to be will help you know which lengths and sizes of pipe you need. We wanted ours to have four pieces of pipe to hang off of so we put everything together using the 4 way connectors. We also added the end caps to each end piece of pipe. We also screwed in our center pipe into the bottom center of the bucket.
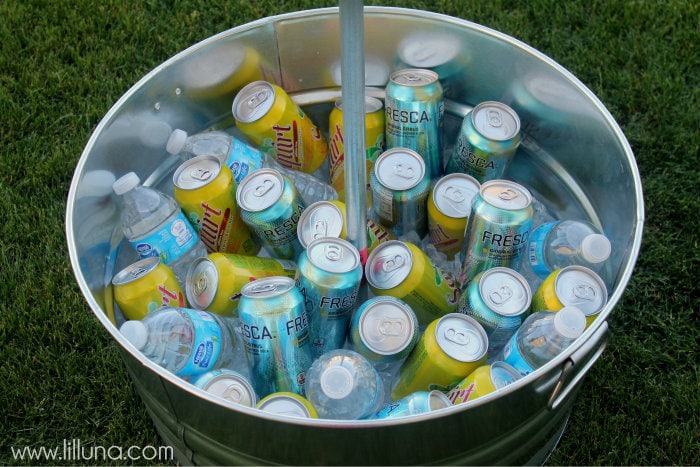
4. Then we filled the bucket with ice and soda.

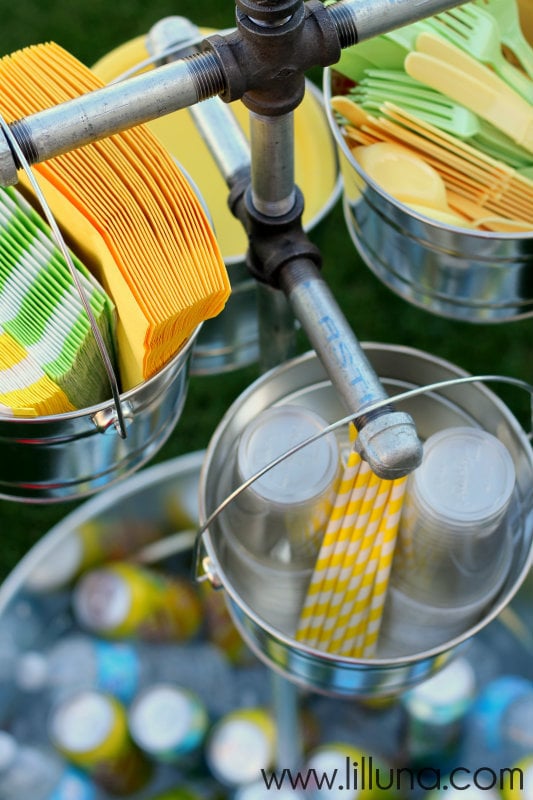
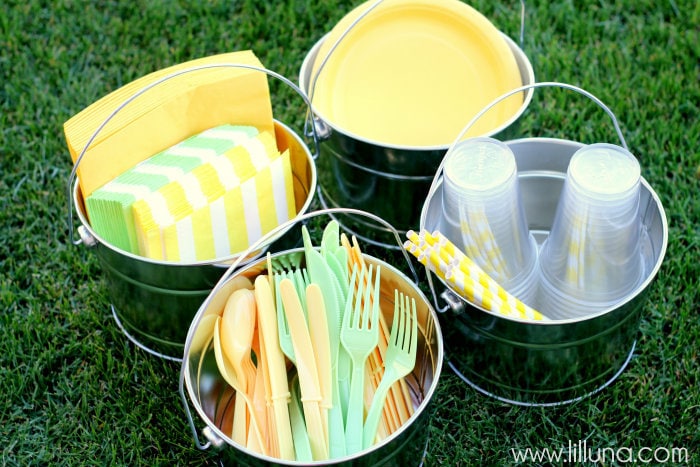
5. We also filled our smaller buckets with our paper goods including napkins, plates, cups, straws and silverware.
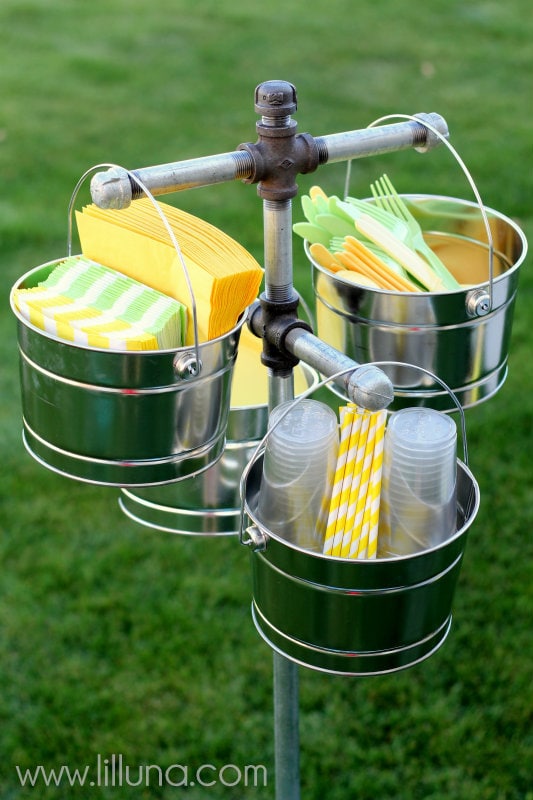
6. Then we hung each smaller bucket off of the pipes.
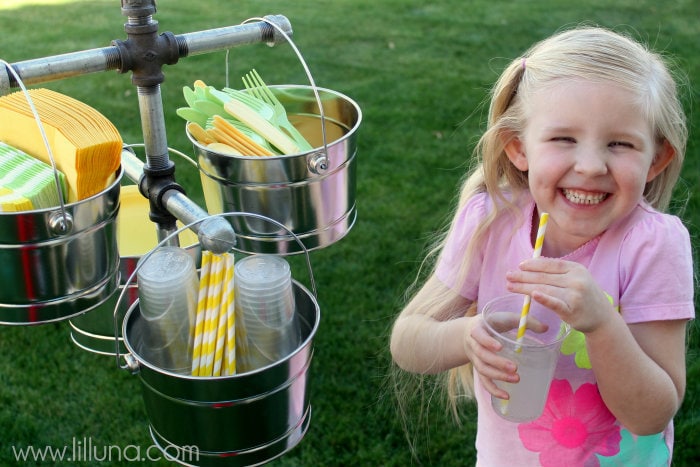
My daughter joined me for the photo shoot and helped herself to a nice, cold drink as well. Too cute, right?!
I’m so happy how this Beverage and Paper Goods Station turned out. It was so easy to make and could be used for any event from a BBQ to a Holiday Get Together. And the paper goods can be switched by color so easily for any event.
Gotta love functional and versatile Outdoor Decor!
For even more great DIY projects, be sure to check out:
![]()
For more creative inspiration, visit Lowes Creative Ideas and Lowes.com
This is a sponsored post written by me on behalf of Lowes. All opinions are 100% mine.


I just wanted to say that I think this is such a great idea. I especially love the buckets! Thanks for sharing!
This is such an awesome idea! I can’t wait until we have a backyard. This will definitely be something I use all the time..
This is sooooo clever!! Way to go my friend!
kisses
heather
This is a great idea. A must have for sure especially with little kids at a party. Thanks for posting.
This is genius! What a great idea. 🙂
Kristyn, this is SO CUTE. And clever. (Your daughter is adorable!) I am going to make this. Might make another one for a towel station at my pool or at the hose for camping. Love it! thanks for the clever ideas!! Keep ’em comin’!!
Totally in love with this idea – so fun!! I need one.
Awesome idea!!
I absolutely love this idea! So fun AND practical! Thanks for sharing…and making summer get-togethers better. 🙂
Kelly
Great idea … it frees up table space too!
This is adorable. Did you get all the supplies from Lowe’s and what was an estimate of the cost?
Just love this idea… Thank you for sharing. I can already see how something like this can be so useful for some events I have coming up.
Just wondering where you found your pails. I live in a pretty remote area so wondered if there was an on line site to fine them.
Everything is from Lowe’s so I would check lowes.com 🙂
How tall is the middle piece that comes out of the bucket? I was trying to price it online to see if I wanted to attempt it before our party Saturday.
You can make it however tall you like, but ours was about 3.5/4 feet. 🙂
I’m working on mine right now. Waiting for the compound to dry.
Let me know how it turns out. 🙂
It’s not working AT ALL. The glue didn’t hold at all. So I’m going to go to Walmart and get a weight to hold it down. it should work that way.
Did you use J-B Weld? Not sure went wrong if you did – ours was rock solid! :/
You can also drill holes through the bottom of the bucket to secure the pipe with machine screws and then spray clear flex seal spray (lowes) on the bottom and on the top and it should create a water tight seal. For an added seal use sealing screws, nuts, and washers.
This is the coolest idea ever! Angela
I LOOOOOVE this so much and I am headed to Lowe’s tomorrow!! I was wondering what diameter and length your galvanized pipe pieces were that you used. They look to be about 3-4 inches long in the picture, but it would be great to know the diameter as well 🙂 Thanks a bunch!!
SERIOUSLY one of the BEST ideas I have seen in a long time! Way to go girl!!!
This is great! so glad I ran across- I just saw this in a store that I almost bought at $70. It was actually a towel rack for the pool- only difference were the bars were a little longer. Now I can make it myself! Thanks… now I will have 2 uses for it!
This is so cute! Love the beverage idea, but ,like Susan, I have also been looking for a pool towel holder like this too! I was thinking of making one with pvc pipe, but the galvanized looks sturdy and I like your point about being able to turn them to line up for storage! I’m thinking the large bucket will be good for the pool toys, while the towels hang above! My only question is, I’ve never used J-B Weld before, does it hold up well?
A towel and pool toy holder would be awesome!! The JB Weld is great. We put on a bit to make sure it worked and let it set for 24 hours just to be safe but it holds up great!!
Do you have a rough estimate of what the finished project cost? Thanks
$75.00
2016 COST UPDATE:
I got my parts at Home Depot. I guess prices gave gone up with inflation as my parts cost over $100. I also had the same problem as Jackie above, as the JB Weld did not hold even the single long center pole (mine was 4 feet tall) after letting it dry for 26 hours. It is a really neat idea, but if I had know it would cost over $100 before I started, I wouldn’t have tried to make this.
Good luck to all who make this, have fun!
Wouldn’t this be a cool planter too?
Now that would be a great idea! This would have been super for our sons graduation parties, but now that they are grown with kids of their own they would make great gifts for them and a great place for flowers for us!
Curious, I have very rough boys so I am thinking of alternative holders for the items than the buckets. The buckets are so cute but I can just see them tipping them over every time they were to grab a cup or utensil. 🙂
I live this!! I would like to make several to give as gifts (house warming!), can you tell me what the cost was to make?? Thanks!!
Hi Cristina!
I think in the end it cost about $80, but that included the beverages, ice and paper goods. I didn’t have any of the supplies and had to buy everything to make from scratch but I’m so happy how it turned out. 🙂
How did you screw the pole into the bucket?
Never mind….passed over that step. 🙂
This looks awesome! I may have to add it to the list of backyard projects. I found you over at Somewhat Simple’s link party.
Great Job.
Tammy @ thecoloreddoor.blogspot.com
I love this beverage station. It just screams summer patio party:) We love entertaining on our patio and this looks like a fun idea.
What a brilliant idea! (and manly enough for the hubby to appreciate). I’d love if you’d come and share at Inspire Us Thursday at Organized 31. http://organized31.blogspot.com/2013/06/inspire-us-thursday-link-party-4.html
Oh my goodness, that is GENIUS. Also, your kiddo is adorable!
This is a great idea! About how much do you think this cost all together? Without the soda and paper supplies. Thank you!
This is BRILLIANT!!! I love it! I am so going to make this. Thanks for posting.
Just made two of these over the weekend. One for my sister-in-law’s birthday, made hers to accommodate towels since she has a pool. Made one for myself for drink/table ware station. My total cost was $80.79 that include state tax. I was able to save a little by getting two tubs at a flea market for $10 each. The only thing I did different was add a base to the bottom of a small paint can so I could attach it to the top as a flower vase, if I don’t want to do flowers I can just cap it off as shown. I loved this project, so easy, useful and cute. Thanks for the idea.
Thanks for the comment, Sherry! SO glad you liked it and was able to make two of them. 🙂
so smart, cute & darling!!! love it.
oh my goodness, this is absolutely adorable! What a wonderful idea! I would be honored if you share this at my link party, Ginger Jamboree!
The glue is really strong enough to hold up the pipe? It seems like it would fall over. I’m hosting a family bbq this friday and this would be really cute if it actually works.
It definitely works!! The glue is made to be VERY strong and never gave us any issues. Now, if a kid starts jumping and pulling and swinging from it I’m not sure if it would hold, but it wrked great for our paper goods in the buckets. 🙂
This is just so clever! This would have come in so handy when we had our sons graduation parties! So clever!
I am so happy I could finally find this again! I am going to try and do something similar for my outdoor wedding! This is fantastic!
Where do you get those cute little buckets?? I love everyone else’s ideas on towel holder for the pool and a planter! Can’t wait to make at least one!
Everything but the paper goods and drinks were found at Lowe’s. 🙂
Hi! I LOVE this craft, however…..
I know many people have asked you and I’m not sure they’ve been answered, but my question:
What size pipes did you use? I am a person that likes direction and clean, cut directions at that. I got that the center pole was about 4 feet, but what diameter and what about the others? Also, I’m in Oklahoma and the lowes I went to here did not carry the 4-way connector. I plan on going to ace hardware to find everything.
Hi Rebecca. The pipes we used were about 1 inch wide. I would give you exact measurements but the station stayed in AZ when we moved. We know people like to do things the way they want and know that any size pipes work as long as you get the connectors that fit it. If Lowes doesn’t have the 4 piece connector, I would definitely try Ace. We were able to find everything we needed in the piping section at Lowes and they had a ton of every piece. Hope this helps. Let me know if you have more questions. 🙂
I would be interested to know how the weld held up. Has it been in use long? Or does it have to be redone every year or so. Thanks, love the idea.
We actually ending up leaving this (along with half our house) to family and friends when we moved this summer, but from what we know it’s still going strong. 🙂
This is awesome, Kristyn! Just what I need for our Memorial Day Party!
Where do you get the pails?
All supplies except for paper goods were purchased from Lowe’s. 🙂
tractor supply or most feed and seed stores
as a designer.. (LOVE this by the way) I would use this pattern.. though instead of gluing anything I would cut/ Punch hole in the bottom center then push the bottom connecting piece …small end through the bottom of the bucket..and add a sealer and rubber ring to the bottom before hand and a WASHER on the top (smaller end ) before the u add the screw on pipe..easier and it should be just great..
Love the idea, could you please tell me where to buy buckets? Thanks
So glad you reposted this. I had to pin it for future use. Maybe for my Labor day bash.
I’m so glad that I click on this link. Love the ideal. Will make it for my Tailgate party.
It will be a hit at the party! 😀
What are the sizes/lengthens of the pipes and pails?
Ok this looks good but I have one question I did not see you mention : Is the post going through the bottom whole tub ? or what really holds the support and how will they withstand wind I would like to have it but don,t need to waste money for I have teens around as well as small ones
Great idea. Love love the industrial aspect of it. Can’t wait to make ours. Thanks for sharing.
You are welcome! It’s so easy to make, Angie. I think you’ll love it! ;D
I’d love to do this – what are the exact dimensions of the pipes. & how did you attach the tall pipe (length?) to the big drink bucket? Thanks.
Never mind – figured it out. Thanks for the great idea.
You’re welcome!! I hope it goes well. It’s been one of our favorite projects. 😀
How many quarts are the buckets and where did you get them?
It was this 15 gallon bucket – http://www.lowes.com/pd_90007-63872-2GS_1z0wqlf__?productId=3728459&pl=1 😉
I saved this a couple of years ago because I think it’s fabulous! I’m going to try an make it this weekend and use it for our 4th of July party. I love the one commenter’s idea of using it to hang towels and have the pool toys in the bottom. Hmm…thinking of other uses too. How about a hanging rack for dog leashes, a hanging basket or two for grooming supplies, and then the dog toys go in the bottom. Ta-da! So many choices. Wish me luck!
It would be the perfect Pet Rack too!! GREAT IDEA!! There really are so many ideas for this! Good luck making it. I promise it’s super easy. 😉
Very creative! Thanks for sharing!!!
You’re welcome. Thanks for stopping by!! 😀
WHAT A WONDERFUL IDEA I WAS THINK THIS WOULD BE GREAT FOR THE BATHROOM OR FOR A BEDROOM OR MAYBE FOR AN HERB GARDEN OR MAYBE A TIE RACK FOR DAD OR FOR HIS BELTS ALL KINDS OF IDEAS THROUGHOUT YOUR HOUSE OR MAYBE EVEN THE KITCHEN.
So many great ideas! Thanks for stopping by. 😉
I LOVE this! My husband and I bought most of the supplies today. We went to Home Depot. Now we’ll have to go to LOWES for the rest of it. Should’ve gone there first, but he prefers HD. We plan to use it for my daughter’s birthday party this month and then my friend wants to have it for my baby shower this summer. It’s a coed baby-que theme. Can’t wait to see how ours turns out!
Great job.. I like the height.. What are the lengths of pipes you used
This is awesome – just sent the link to my hubby asking him to make it for me!
Does this create a watertight seal, or does melting ice leak through the bottom?
I hope he does! We didn’t have any issues with leaking. Have fun!
Love the beverage station! I’m making mine with the lower level pipe hangers long enough so that one can hold a roll of paper towels!!!
Great idea!! Thank you for letting me know! Good luck!
Thank you so much for the drink station idea. I’ve been looking for something to make for my dad for father’s day. He and my mom host a lost of summer parties and this is perfect. And easy enough I can do it in a day!
Glad you could find the idea! Good luck making it! He’ll love it!
Hi, can you please tell me what size pail and bucket did you use? Got the Galvanized pipe but can only find the 2.5 quart pail, no luck with tub.
how did you screw the pipe into the bottom of the bucket? does it leak? and did you do 1/2 inch or 3/4 pipe and connecters?
We used Original J-B Weld to glue this piece to the bottom center of the large bucket. We used this connector piece to put in a large piece of pipe where the smaller buckets would hang off of. And we used 1 inch pipes. 😉
Hi, I really like your beverage cooler. Summer looks cooler with it. I have a question ? What type of nut did you use on top of the flange? also, do you know if they have nuts that can fit a 2″ flange. i am planning to make a cooler with a little twist
Love this !!!
Thanks so much!!