Today I will be showing you a SUPER EASY process of how to antique painted wood.
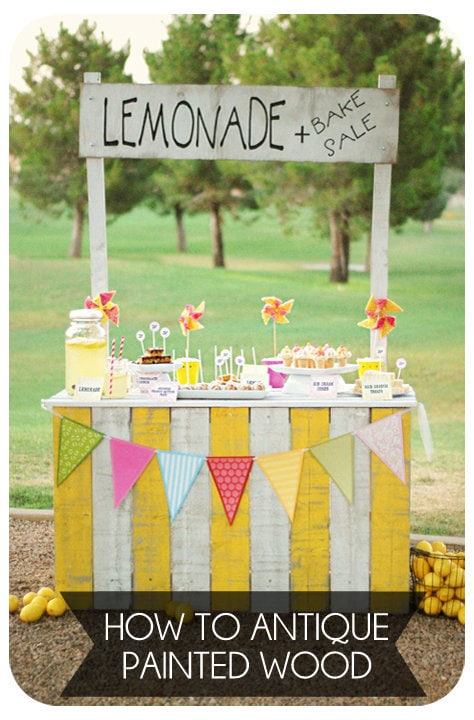
{Pic courtesy of Jacquilyn Avery Photography}
SUPPLIES:
-Rustoleum -colored spray paint, Gloss clear spray paint
-Rough cut lumber
-low grit sand paper
-acrylic paint
-rags, brushes
DIRECTIONS:
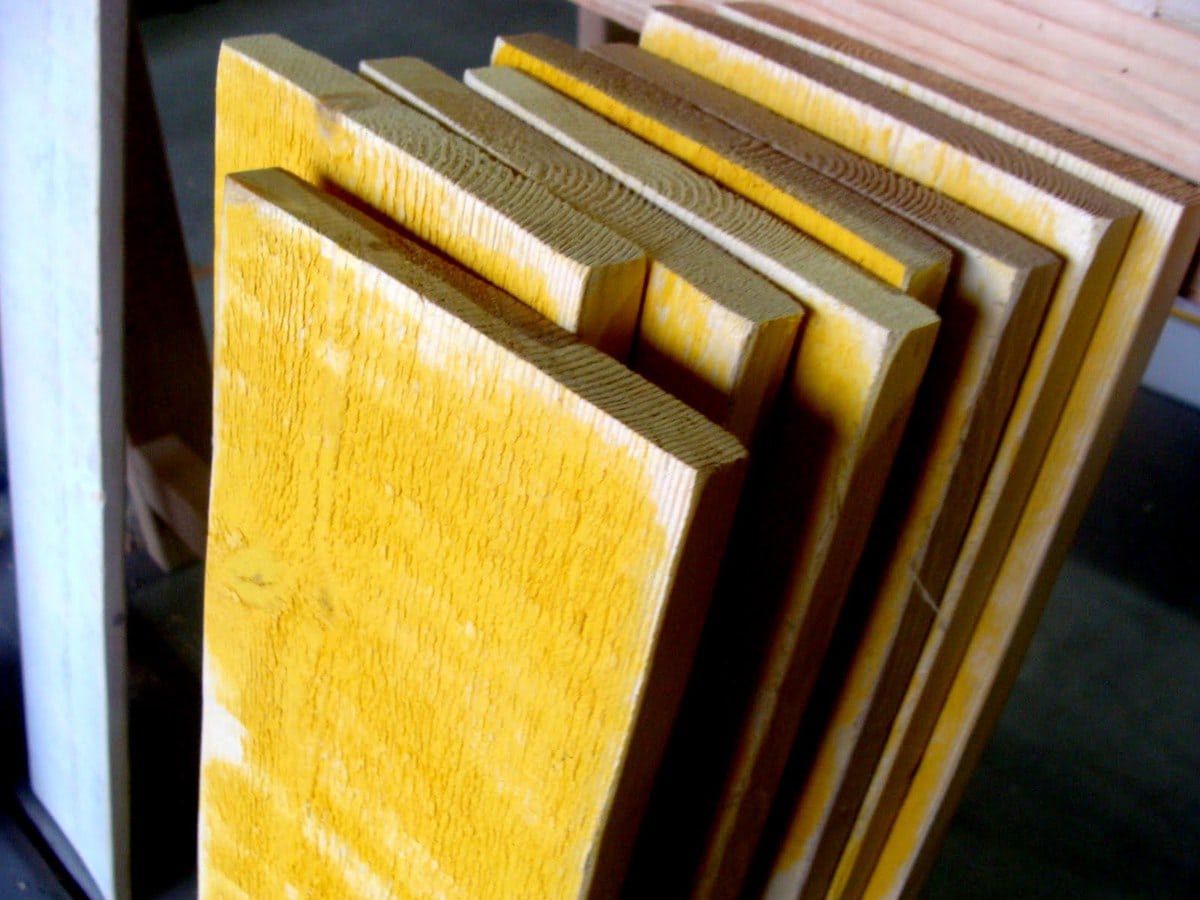
1. Pick out your wood. The secret here is to buy the roughest wood you can find. We found some great rough cut lumber at Home Depot.

2. Using the Rustoleum spray paint (or any other color paint) paint the wood the desired color.
3. After the paint has dried, seal it with a Polyurethane or clear coat. We like to use Rustoleum’s clear gloss paint, because it does not yellow and is much cheaper than polyurethane. Whatever you use, it needs to be a high gloss. This seals the paint from soaking up the aging paint that you will be applying in the upcoming steps. If you use a satin or matte, it may pick up the aging coat.
4. Generously sand the entire board. Concentrate on the high spots as well as all the edges and corners. You want to take a way a lot. The more you take, the older it looks. A low grit sand paper (nothing higher than 60 grit) keeps it looking raw. We used 24 grit and a belt sander, which worked nicely.

5. Once you have removed the paint where you want, it is time to apply the aging coat. For ours we wanted a grayish brown aged color. We mixed black, brown and off-white acrylic paint together (with much more black than the other colors) We then diluted it with water until it looked like blackish water. It will take some trial and error to find the exact concentration that you want. The more concentrated, the darker the the aging coat will be. I had a scrap piece of wood that I tested mine on. Just remember that as it dries, the color will lighten, so it may seem a little dark at first.
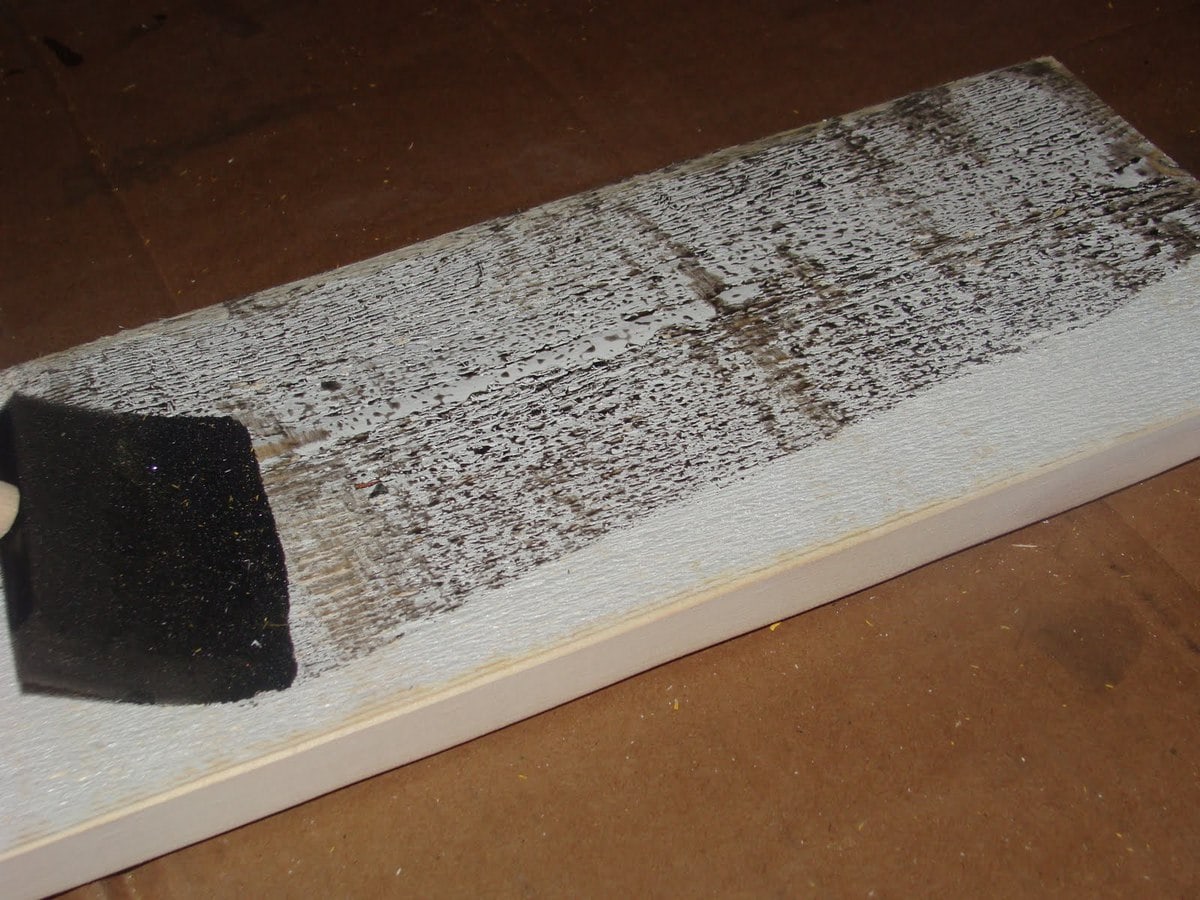
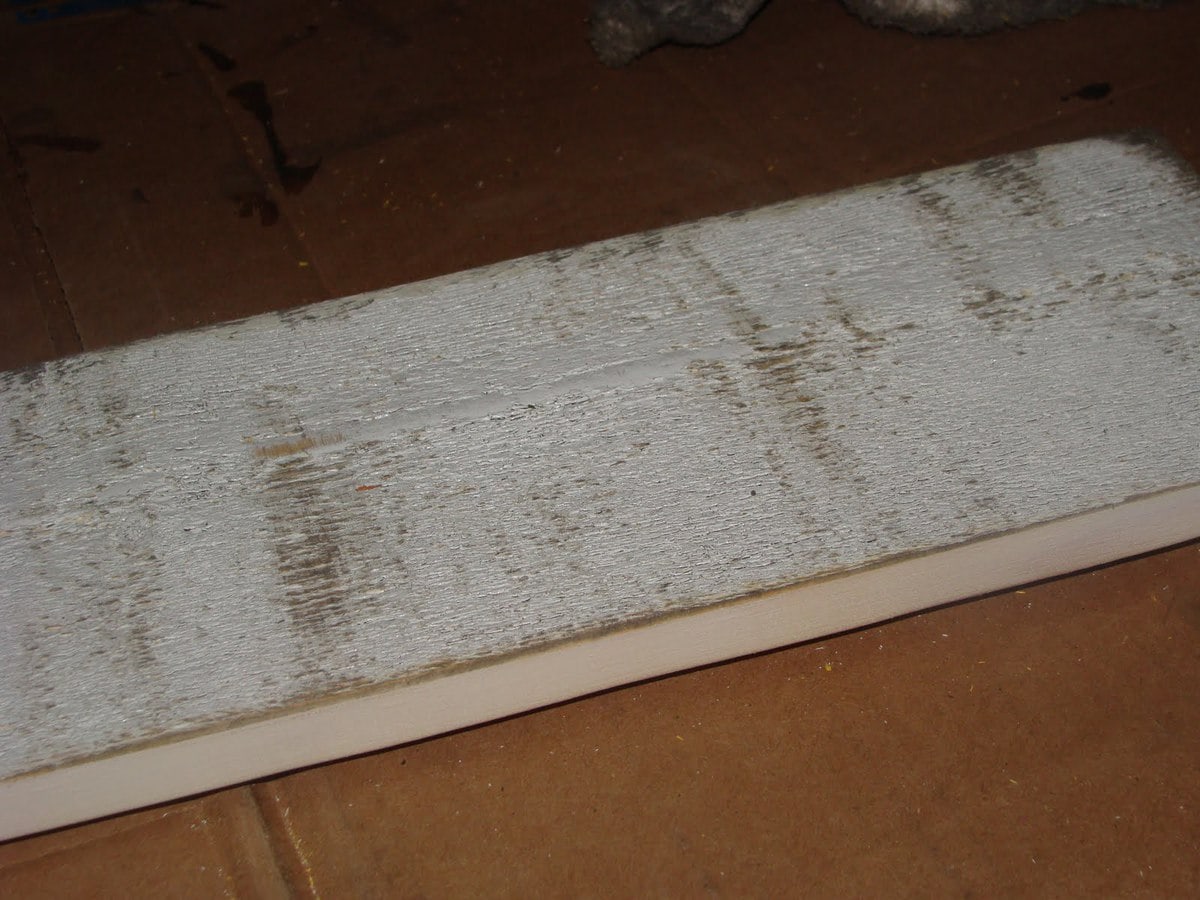
6. Quickly apply the mixture with a brush to all the sanded areas. As soon as it is applied, wipe off the paint with a rag. The longer you let the mixture stay on the wood, the darker it will stain it. I did half a board at a time, so as to not let the mixture set too long. We did ours on pine wood. A harder wood like oak or poplar might need to set a little longer. This dyes the raw wood with a gray-brown color and puts a slight darker shade over the painted areas.

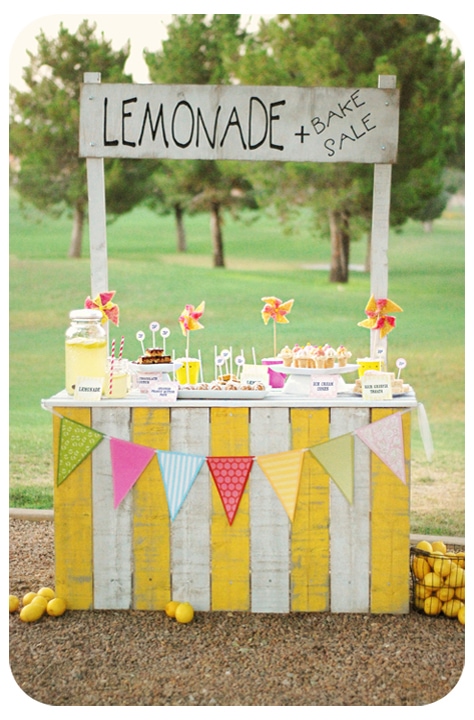
Doing this easy process will allow you to get that perfect antiqued look without having to use or find the antique wood itself.
For more great DIY projects be sure to check out:
For all DIY projects go HERE.
ENJOY!


This is SO DARLING!!! I absolutely love it, and thanks for the tutorial!<3Risa
Love it! Sounds super easy to do too!
Thanks.
I love this! It's such a good idea! You girls totally should have won. :)Annawww.askannamoseley.com
You make this sound easy – I have filed this idea away for future reference – thanks
I've been waiting for this, my friend!
So darling! Great Job! Love the new blog design! Way cute!:)xoxo,Ashley J @ mommybydaycrafterbynight.blogspot.com
visiting from ginger snaps–ok, easily the very BEST, most WONDERFUL lemonade stand i have ever seen…i mean who wouldn't stop to buy lemonade from kiddos sitting at this???:) i love it! the tutorial on the wood is fantastic as well. thank you…newest follower!
Thanks for the great tips!! I am pinning this so I remember the next time I am painting!
I love the look of antiqued wood. Thanks so much for sharing this great tutorial.
Thanks for the tips! I plan on doing this to my sons furniture soon! I hope you will share at my party! : ) http://www.cherishedbliss.com/2011/07/craft-and-tell-no-15.html
So cute!! Would it look weird if a 27 year old sold lemonade in front of her house? 🙂 ~Cookin' Cowgirl
Great post I love the look of antique wood and have needed to get some know how on the process!!!! Love the stand! I want to make one!
I saw this on Night Owl Crafting and just wanted to say I LOVE it!! This could not be cuter!! 🙂
Hi Krisyn! I love the new layout of your blog! And I love this project. I just pinned it and have been seeing it everywhere!I know its a lot to ask of the "big bloggers" but I was just wondering if…..you'd link this up at my Link Party, Once Upon a Weekend on my blog Family Ever After. It's a new party, and I'm trying to get my name out there!Here’s the link if you’re interested:www.familyeverafter.blogspot.comAlso, I would love to be included on your list of Friday parties, if you have time. Thanks a ton! Have an awesome day!!!
I can think of so many uses for this technique!
Thanks for showing this great tutorial! I absolutely love this cute little lemonade stand!
Amazing! I think hubby will have to make one of those as a Christmas present for our youngest. Just darling!
I LOVE your lemonade stand! Do you have plans for it somewhere? We have our community garage sale in two weeks and my girls have been begging to sell lemonade at it. Thanks! Please come by and show this off at my VIP party today =) http://designergarden.blogspot.com/2011/07/vip-party-21.html
This will be featured on my blog tonight! Don't forget to pick up your button. Hope to see yo link up again this week : ) http://www.cherishedbliss.com
cute cute cute! great ideas. thanks for sharing! kathrynwww.thedragonsfairytail.blogspot.com
My hubby and I made the stand this morning for a charity garage sale my mom puts on. I had the kiddos help me run a lemonade + bake sale and it was a super hit with your stand idea! Thanks so much for posting it!
Thank you SO much for this tutorial! I was wondering—did you have the lumber cut to size or did it already come that way? Thank you so much!
It was already that width but then we cut it to the length we needed 🙂
Did you seal it with anything? Super cute! I love what you did! You’re amazing.
Thank you for the tutorial and pictures. I needed the visual as well as directions. Good job and the lemonade stand turned out great!
thank you for this. i was searching and searching for a lemonade stand made out of pallets cuz i wanted this look! i was wondering how much did the whole project cost? im still leaning on the pallet wood as trying to do this cheapest as possible. my city has lemonade day once a year. having a hard time putting tons of money into something she can only use once a year and she is 6 now. so that makes the stand being used only 5 times tops. but i love the look! thank you again
We did not use pallets and buying everything it cost about $100. I think using the pallet wood would make it a ton cheaper! Good luck!
Brilliant! And such clear instructions. Seems very easy to do! Thanks for the tutorial!
You are welcome. Let me know if you give it a try. 🙂
you will have an important blog right here! would you prefer to make some invite posts on my blog?