• About
  • Privacy
  • Contact

Let's DIY It All - With Kritsyn Merkley

  • Crafts + DIY
  • Printables
  • Holidays
    • New Years
    • Valentine’s Day
    • St. Patricks Day
    • Easter
    • Mother’s Day
    • Father’s Day
    • 4th of July
    • Halloween
    • Thanksgiving
    • Christmas
  • My Home
    • Home Tours
    • DIY Projects
  • Facebook
  • Instagram
  • Pinterest
  • Twitter

August 9, 2011 · 34 Comments

Count Your Blessings Board

Crafts + DIY· Decor· Gifts· Holidays

Cute and Inexpensive Count Your Blessings Board - great gift idea! Tutorial on { lilluna.com }

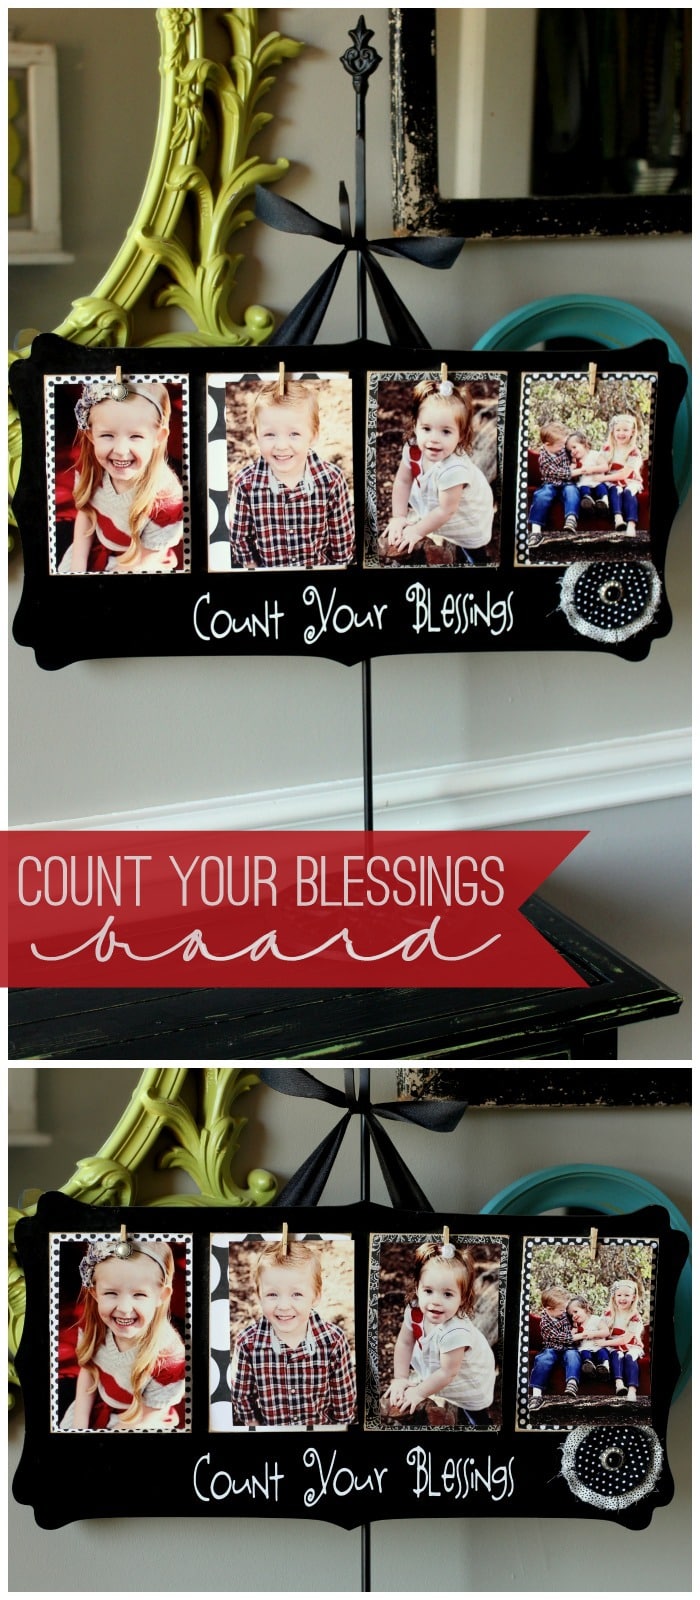
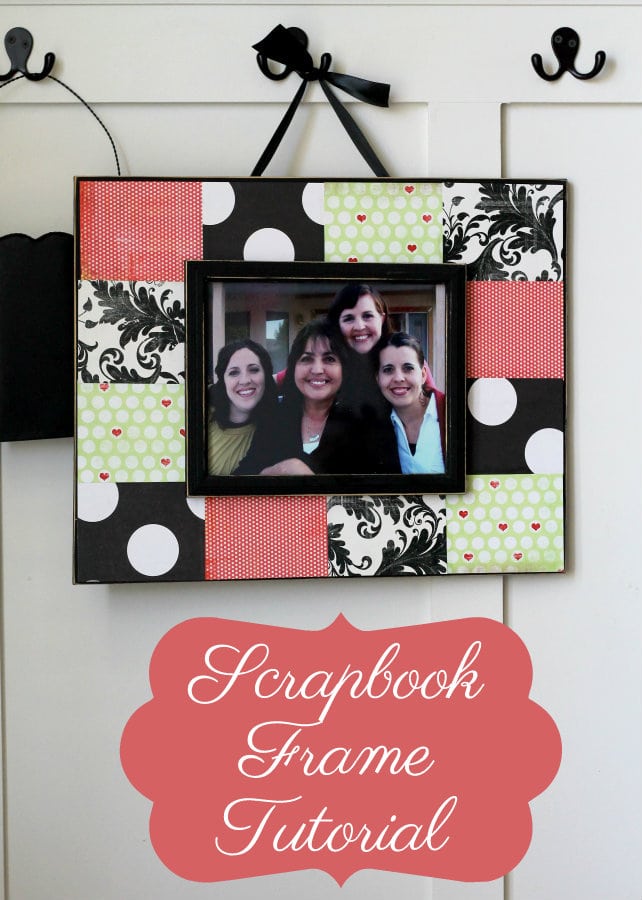
I’m STOKED to share with you guys the adorable hanging we did for our craft night last week.

It really is super simple to do and can be done in any color to match your home. It also is very inexpensive and would make a great gift idea for Christmas, Mother’s Day or even a birthday!

Here’s how you can make it…

SUPPLIES:

-Bead board/Wood
-Hard board
-Saw
-Scrapbook Paper
-Mod Podge
-Foam Brush
-Vinyl
-Paint
-Small Clothespins
-Embellishments

DIRECTIONS:

Cute and Inexpensive Count Your Blessings Board - great gift idea! Tutorial on { lilluna.com }

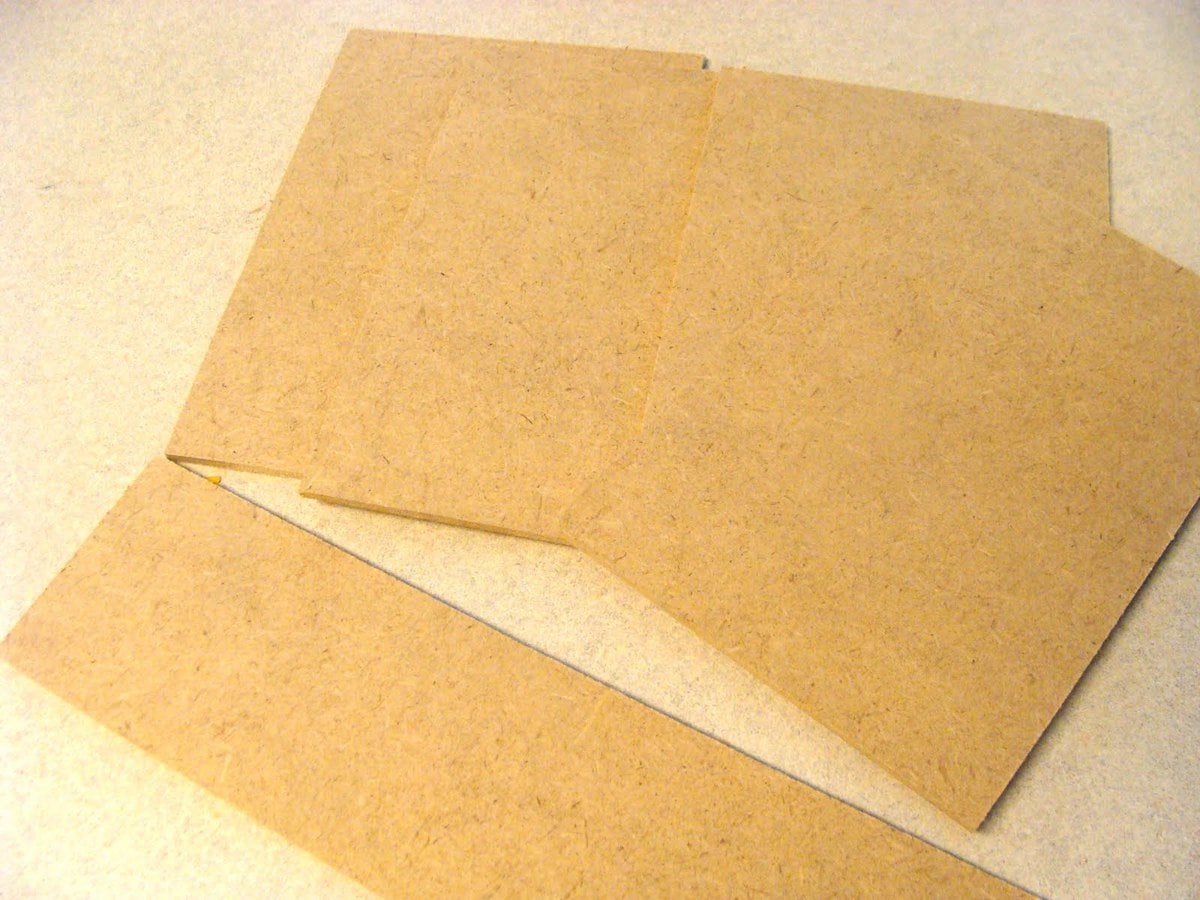
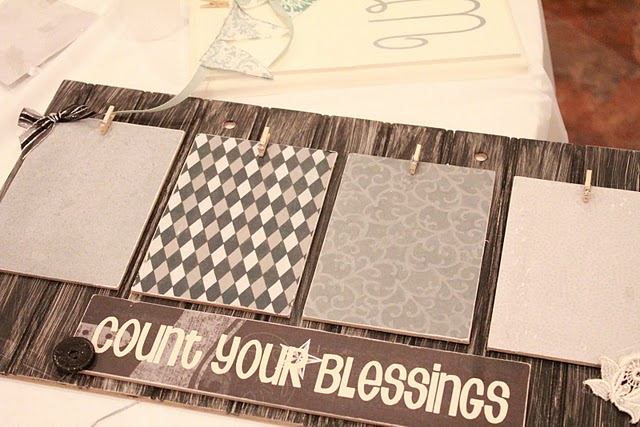
1. Cut your bead board to approximately 12 inches x 20 inches. Also cut your hardboard into 4 pieces that are approx. 4.5 x 6.5 inches. You will also need one hardboard piece that is approx. 2.5 inches x 12 inches.

Cute and Inexpensive Count Your Blessings Board - great gift idea! Tutorial on { lilluna.com }

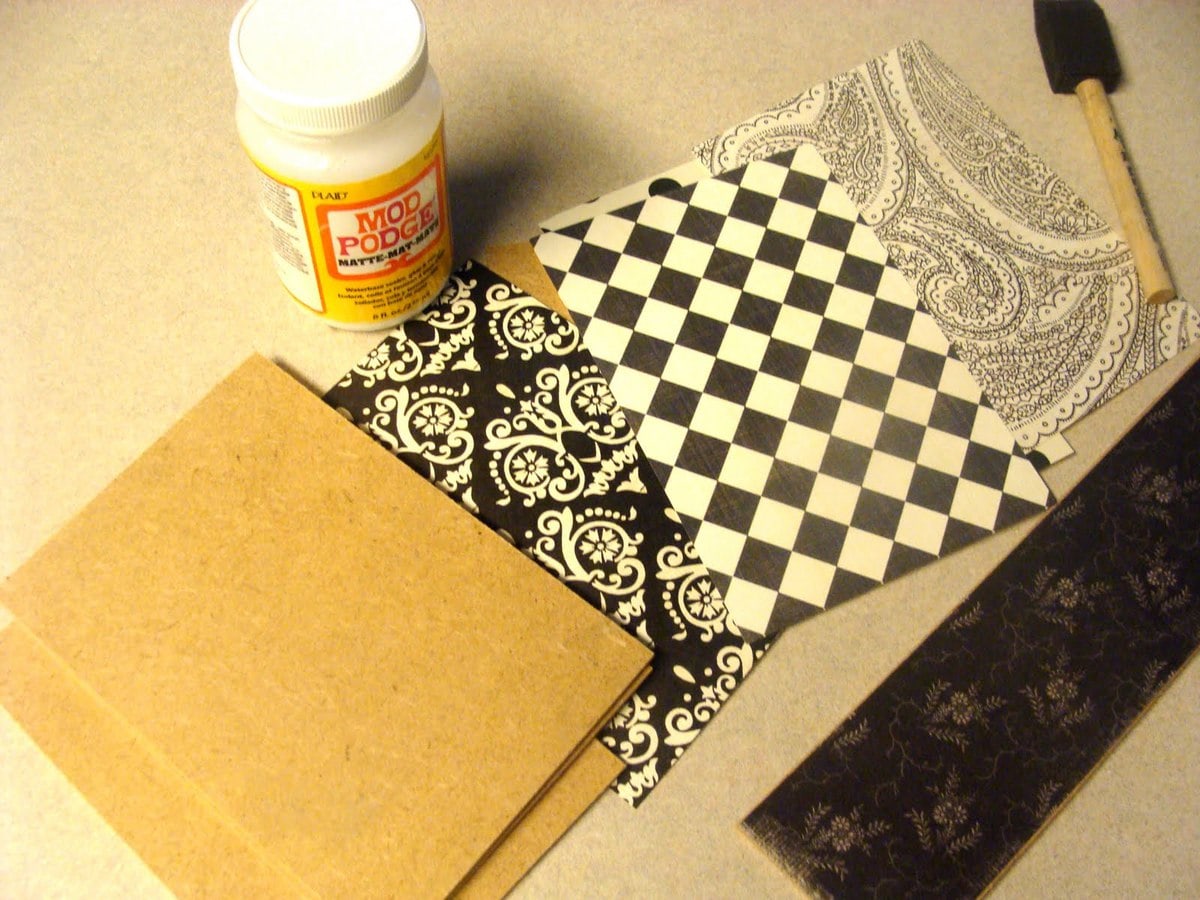
2. Cut our 4 pieces of scrapbook paper that are approx. the same size of your 4 rectangular pieces. Mod podge these on to the rectangles and let dry. You will also cut out one piece of scrapbook paper that will go onto the long rectangular piece. Mod podge this on as well.

Cute and Inexpensive Count Your Blessings Board - great gift idea! Tutorial on { lilluna.com }

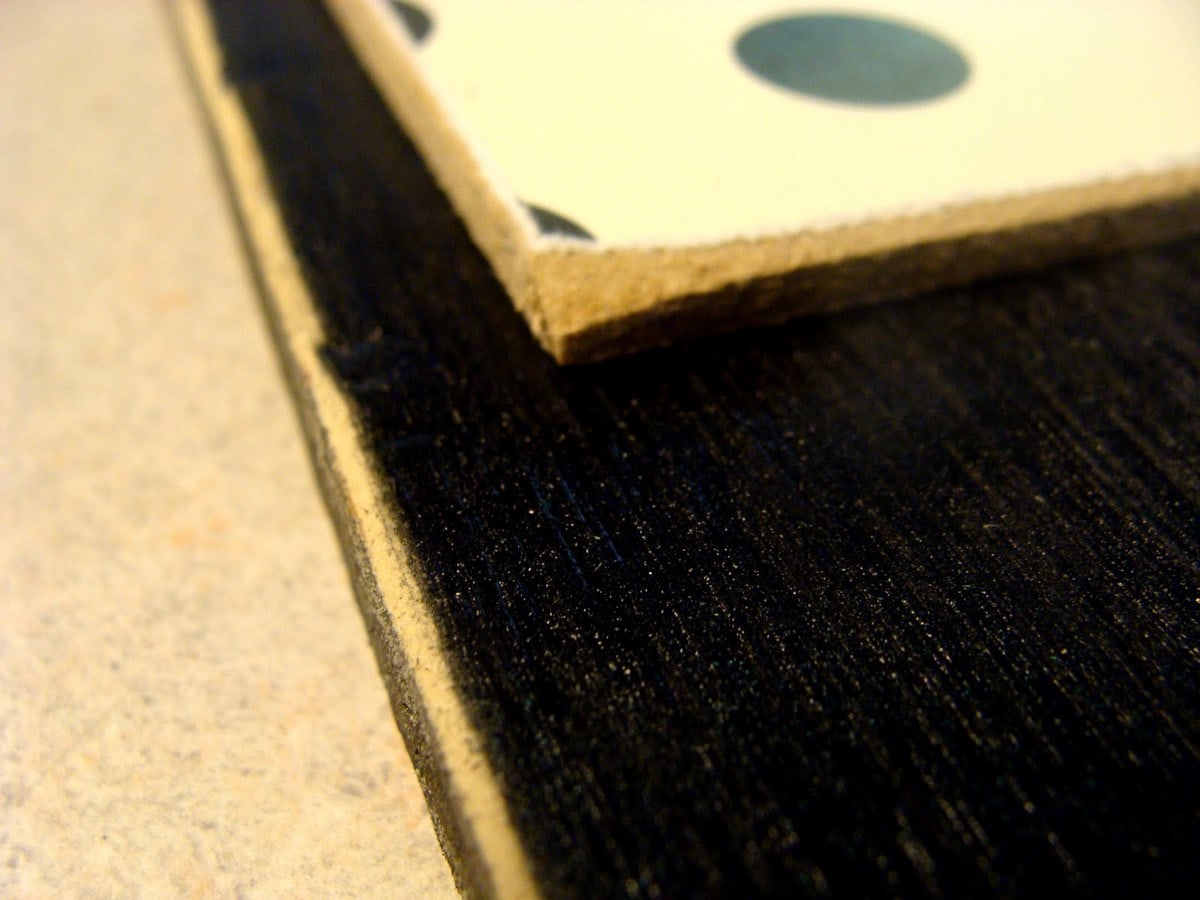
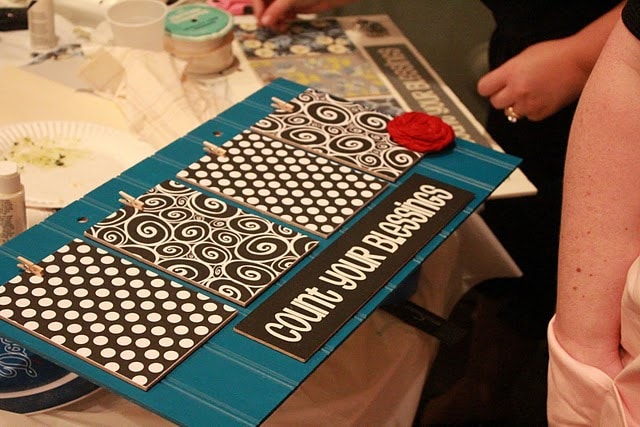
3. Distress beadboard and hardboard if desired.

Cute and Inexpensive Count Your Blessings Board - great gift idea! Tutorial on { lilluna.com }Cute and Inexpensive Count Your Blessings Board - great gift idea! Tutorial on { lilluna.com }

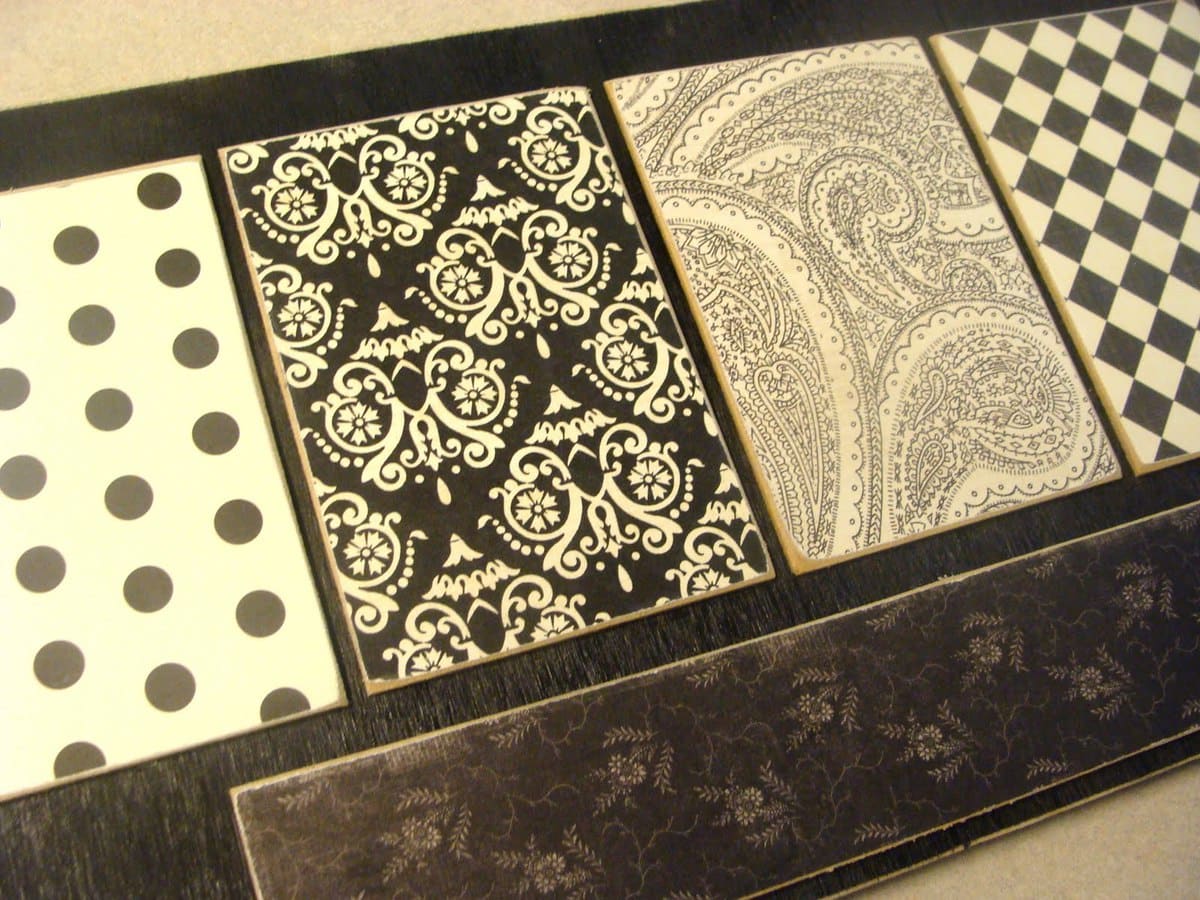
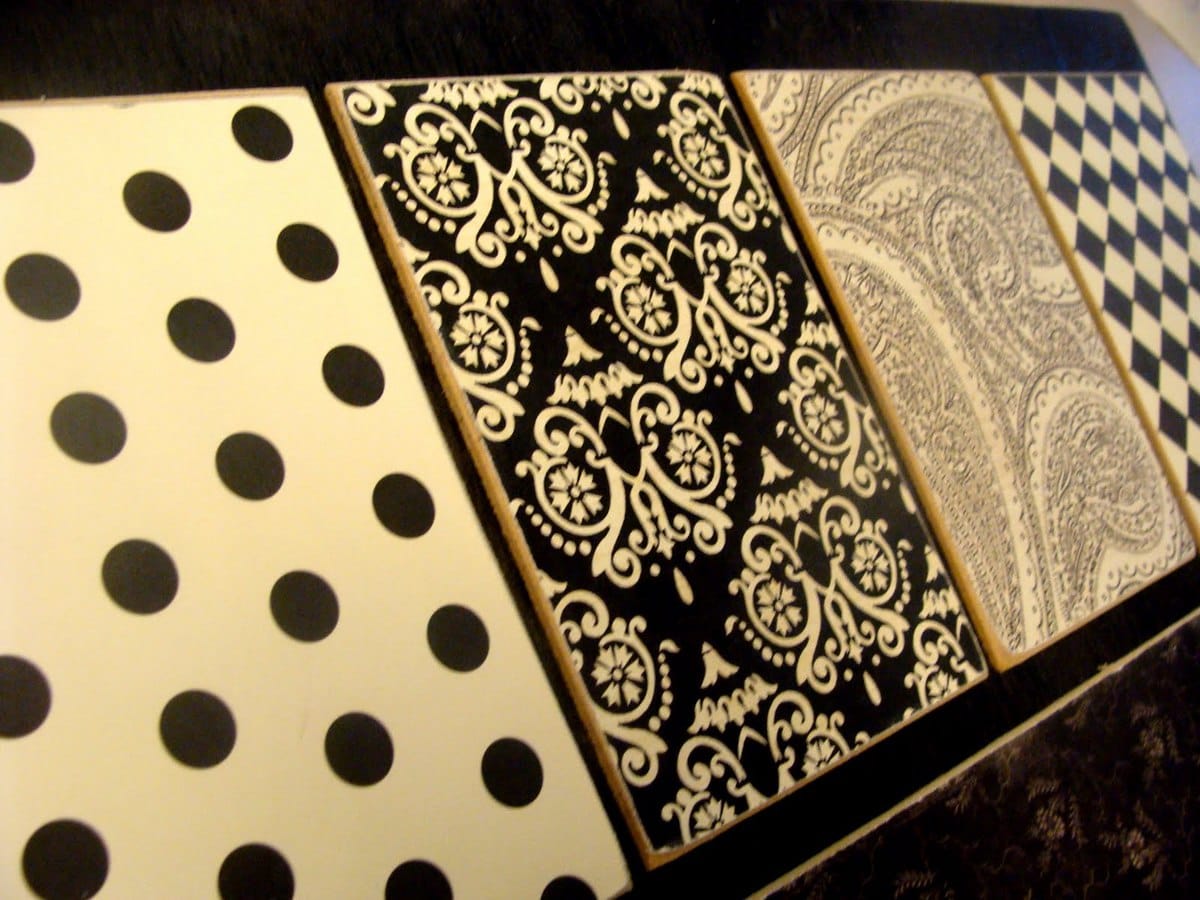
4. Hot glue all 5 rectangular pieces to your beadboard.

Cute and Inexpensive Count Your Blessings Board - great gift idea! Tutorial on { lilluna.com }

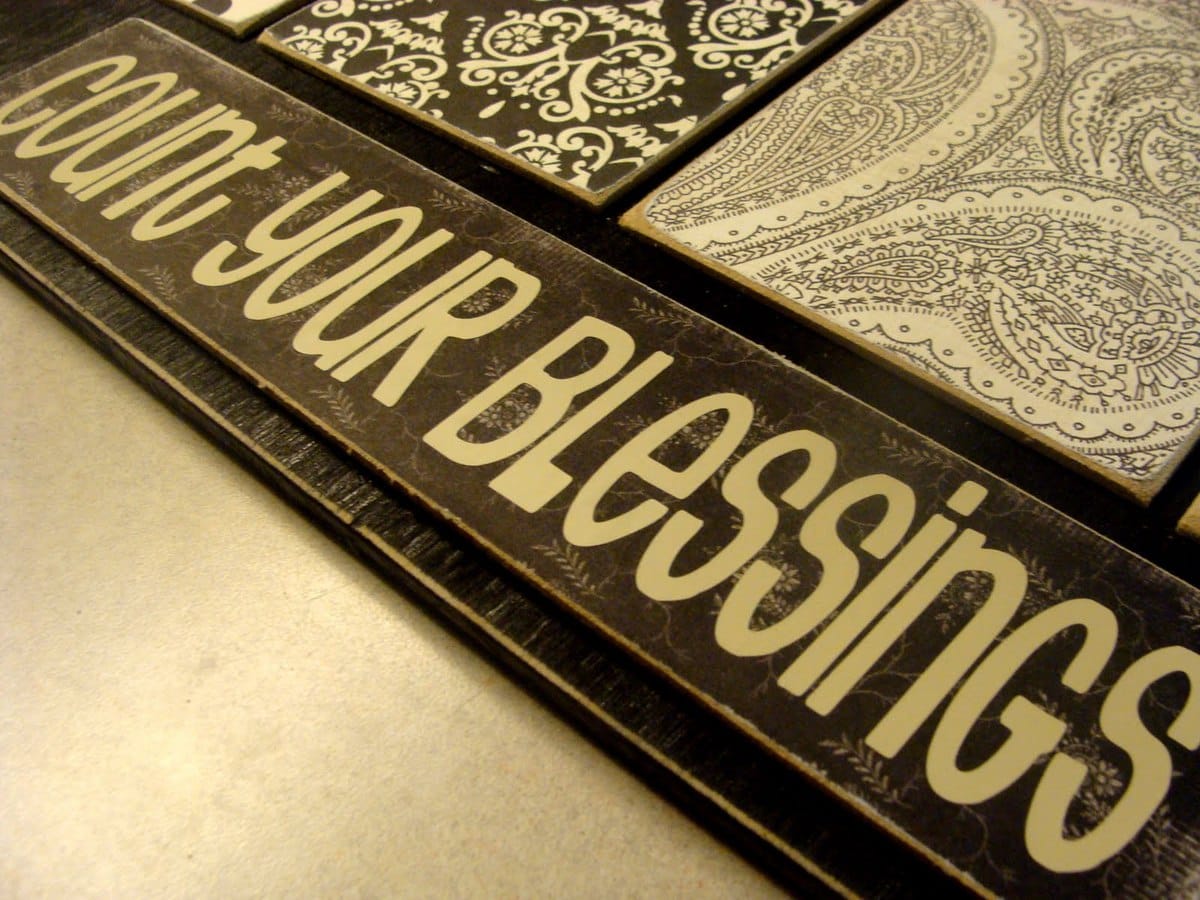
5. Add vinyl to rectangular piece

Cute and Inexpensive Count Your Blessings Board - great gift idea! Tutorial on { lilluna.com }

Cute and Inexpensive Count Your Blessings Board - great gift idea! Tutorial on { lilluna.com }

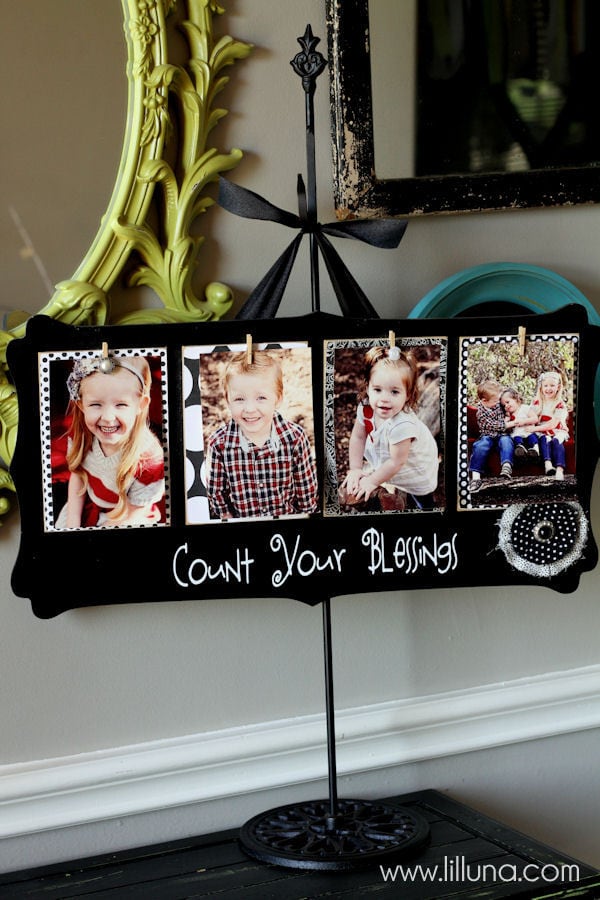
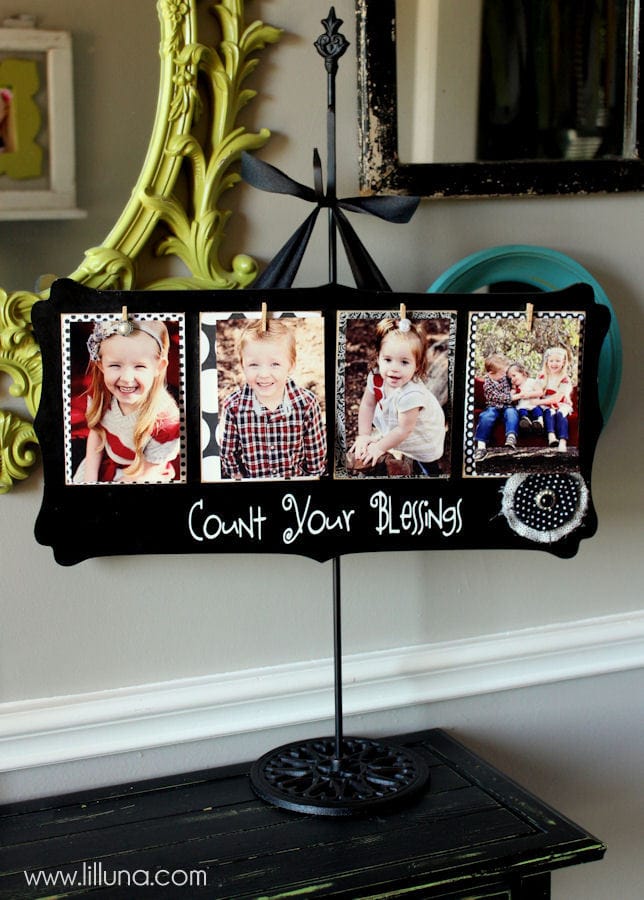
6. Add ribbon to back. I used wood for the sample instead of bead board and to add vinyl I marked the center on the back and then marked a spot 3 inches on either side. I think stapled ribbon to the back using my staple gun and then tied a knot. For the bead board We drilled holes through the top and had them string the ribbon through.

7. Now add embellishments and hot glue mini clothespins to the tops.

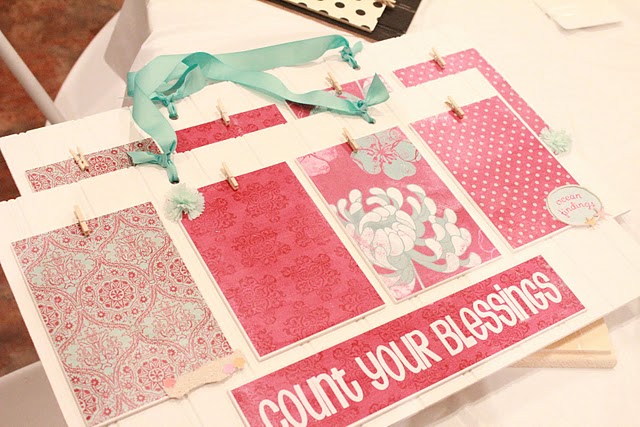
And what’s best is depending on the paint or scrapbook paper and embellishments each board is so personalized and different!

Cute and Inexpensive Count Your Blessings Board - great gift idea! Tutorial on { lilluna.com }

Cute and Inexpensive Count Your Blessings Board - great gift idea! Tutorial on { lilluna.com }

Cute and Inexpensive Count Your Blessings Board - great gift idea! Tutorial on { lilluna.com }

NOTE: You can even put the vinyl straight to the board if it’s flat.

For another cheap option cut up some bead board for the back board to make it less expensive.

Cute and Inexpensive Count Your Blessings Board - great gift idea! Tutorial on { lilluna.com }

Cute and Inexpensive Count Your Blessings Board - great gift idea! Tutorial on { lilluna.com }

Cute and Inexpensive Count Your Blessings Board - great gift idea! Tutorial on { lilluna.com }

Cute and Inexpensive Count Your Blessings Board - great gift idea! Tutorial on { lilluna.com }

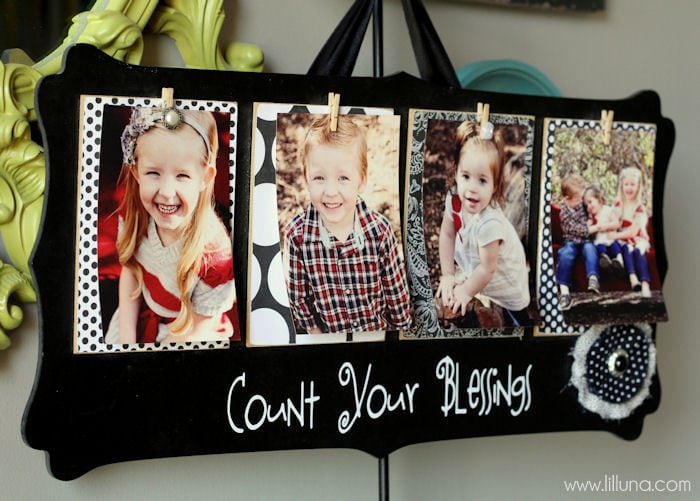
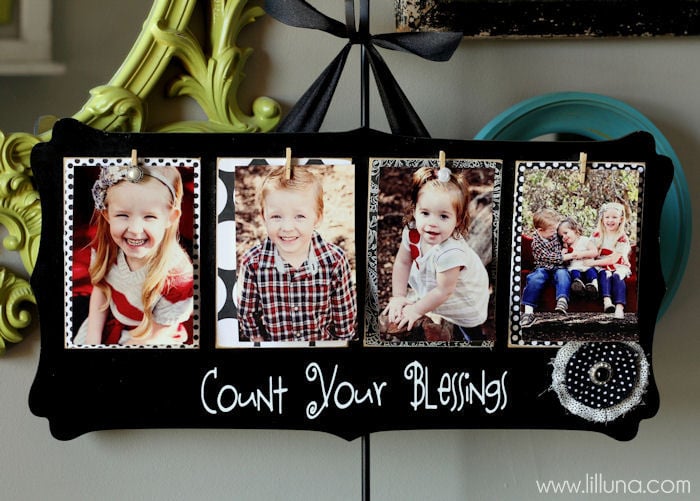
Now you have a SUPER CUTE and EASY way to display photos that remind you to
COUNT YOUR BLESSINGS. 🙂

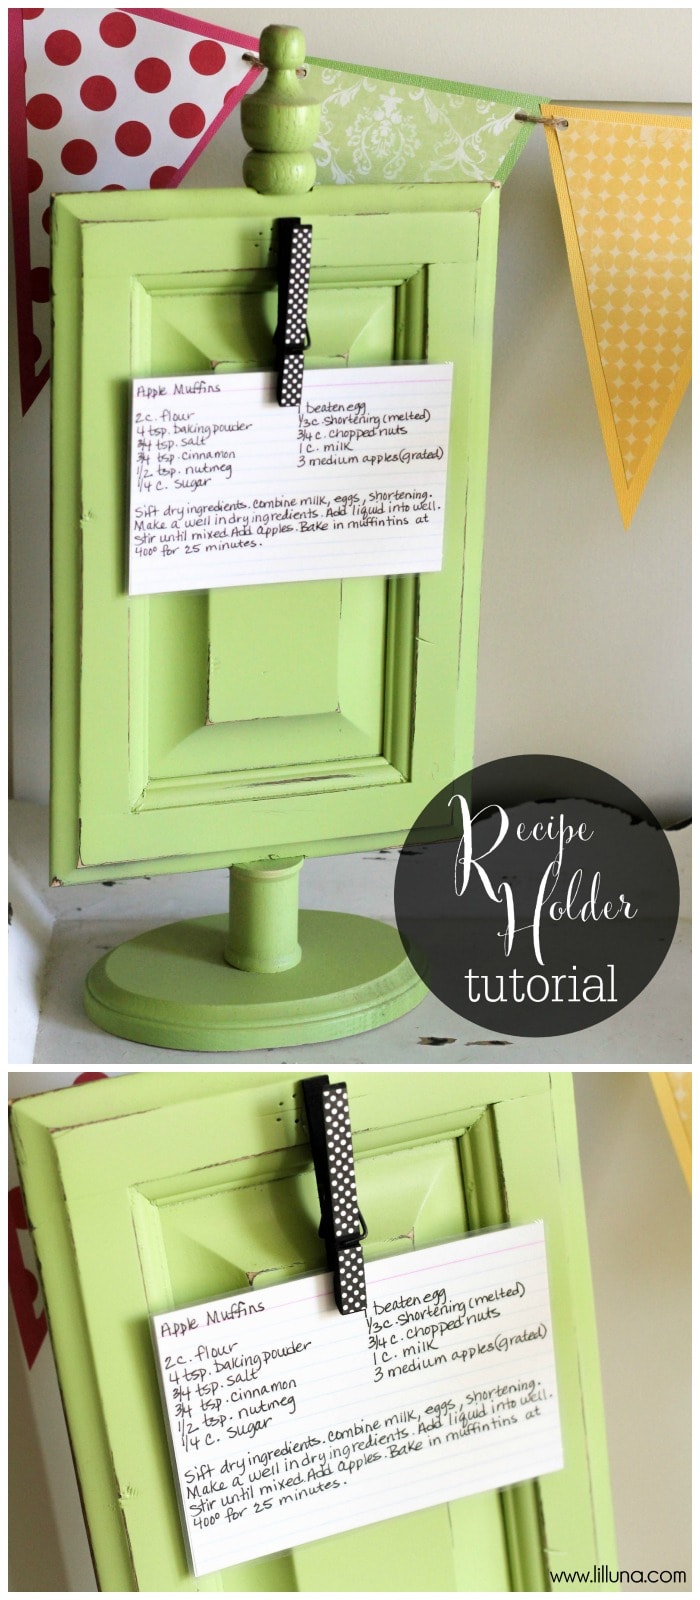
And if you want to learn how to make the
Welcome Bunting Boards
be sure to check our their tutorial on Lolly Jane today.

Interchangeable Bunting Plaque tutorial from Lolly Jane on { lilluna.com }

Interchangeable Bunting Plaque tutorial from Lolly Jane on { lilluna.com }

{Special thanks to Kristi for all the super cute pics of our projects!}

For more simple and cute craft ideas, check out:

Fabric Covered Magnet Frames on { lilluna.com } Super cute and easy to make!!

Fabric Covered Magnetic Frame

Super cute and easy Recipe Holder tutorial { lilluna.com } This is a great gift idea!!

Recipe Holder

Scrapbook Frame Tutorial. This is an inexpensive but great gift idea and craft idea.

Scrapbook Frame

For all Crafts & Tutorials go HERE.

For all DIY projects go HERE.

And get weekly emails with monthly freebies by signing up for the Lil’ Luna newsletter. 🙂

For even more great ideas follow me on Facebook – Pinterest – Instagram – Twitter – Periscope – Snapchat & YouTube.

ENJOY!

Previous Post: « How to Antique Painted Wood
Next Post: FREE Bunco Printables »

Reader Interactions

Comments

  1. Amy C says

    August 9, 2011 at 1:58 pm

    Thank you so much for this great tutorial!! This is such a cute project! I can't wait to go get the stuff to make it. 🙂

    Reply
  2. MamaJB says

    August 9, 2011 at 2:33 pm

    This is adorable! I'm adding it to my "To-Make" list 🙂 Thanks for sharing!

    Reply
  3. Erica says

    August 10, 2011 at 3:47 pm

    I love this! I definitely have to make it! Thanks for sharing. New follower from Someday Crafts blog hop. Hope you have a chance to stop by.http://doodlesanddoilies.blogspot.com

    Reply
  4. Jacque says

    August 10, 2011 at 4:17 pm

    What a cute idea!! I really like it! Thanks for sharing! Jacque @ Jacque's Soda Parlorthesodaparlor.blogspot.comP.S. I'm your newest follower! Please stop by my blog and visit. I would love to see you there!

    Reply
  5. Susan @ Second Chances by Susan says

    August 10, 2011 at 4:43 pm

    Awesome idea…pinned it! Love your blog…following now! Thanks!

    Reply
  6. Karima says

    August 11, 2011 at 12:29 pm

    They look great, what a great job you did! Saw you on linky party, now google friend following you. Please pop by, Karima x http://www.karimascrafts.com

    Reply
  7. gatheredinthekitchen.com says

    August 11, 2011 at 3:24 pm

    Looks great! I'm loving the picture boards! Such a great alternative to picture frames!!

    Reply
  8. Chelsea says

    August 12, 2011 at 7:06 am

    I love this idea! Certainly going to need to find time to make one of these. Super cute!!

    Reply
  9. Amanda says

    August 12, 2011 at 7:01 pm

    This is a fantastic tutorial, thank you for sharing.

    Reply
  10. The Clegg Family says

    August 13, 2011 at 12:31 am

    Cute idea!

    Reply
  11. Sallie says

    August 15, 2011 at 4:19 pm

    I found you through The Girl Creative. I love your tutorial and the blessings board. I ordered a kit!

    Reply
  12. Melanie says

    August 16, 2011 at 2:00 pm

    I have mine hanging near the front door and smile when I see it! Thanks for linking up!Smiles,MelanieReasons To Skip The Housework {The Blog}Tinker B Boutique {The Shop}{[email protected]}

    Reply
  13. Janet says

    August 18, 2011 at 5:15 am

    I can't tell you how much I love this! What a great idea! I'm glad you included pictures of the different ways that they were finished, and how everyone made it their own. Thanks so much for taking the time to write up a tutorial, I can't wait to make one. 🙂

    Reply
  14. Cristan says

    August 19, 2011 at 2:45 pm

    Just a note to let you know I featured your blog and this cute project today! 🙂 I can't wait to try my hand at this! You did a great job. Thanks so much for sharing! http://coffeecupsandcrafts.blogspot.com/

    Reply
  15. lynn says

    August 19, 2011 at 11:49 pm

    such a darling idea-tfs!

    Reply
  16. [email protected] says

    August 20, 2011 at 3:54 am

    Thanks for the great tutorial. I'm a new follower…

    Reply
  17. Jen-CraftOManiac says

    August 20, 2011 at 3:01 pm

    You have been featured at CraftOManiac. Have a SUPER SATURDAY. winks-jen

    Reply
  18. Lynne says

    August 20, 2011 at 9:53 pm

    Lil' Luna, what kind of vinyl do you mean for the 'count your blessings' sign?

    Reply
  19. Mark, Chelsey, and Boys says

    August 21, 2011 at 8:05 pm

    Darling! In fact I'm doing a super saturday soon and was wondering did you have everyone bring their own scrapbook paper, paint and embelishments or did you just have all the stuff to choose from? Thanks

    Reply
  20. dawnaclark says

    August 21, 2011 at 10:42 pm

    Great idea!WHAT IS "HARDBOARD"? I've never heard of it? Do you mean masonite? thanks much!

    Reply
  21. Alicia says

    August 21, 2011 at 11:11 pm

    Sweet. Now I know what I'm making for Christmas gifts. Thanks for the great idea!

    Reply
  22. Jules says

    September 2, 2011 at 4:57 pm

    If only I had a saw, I would totally do this. I love it!!

    Reply
  23. Amy C says

    September 5, 2011 at 3:51 pm

    After finishing this a few weeks ago, I finally got the chance to take pictures of it. Thank you so much for all the help you gave me to get this done! Here is a link if you want to check it out!http://thehappyscraps.blogspot.com/2011/09/count-your-blessings-board.htmlAmy @ The Happy Scraps

    Reply
  24. Blue Velvet Chair says

    September 6, 2011 at 7:43 pm

    What a great photo display. Had to add to my Pinterest 'best tutorials' board. Thanks for the share.Michael

    Reply
  25. lovecrafts says

    September 14, 2011 at 9:24 am

    Great tutorial! i love it very much, thanks for sharing

    Reply
  26. admin says

    November 25, 2011 at 1:26 pm

    Thank you SO much! I’m so glad you like the site! I hope you had a great Thanksgiving! 🙂

    Reply
  27. Laurie says

    December 10, 2014 at 3:37 am

    What is holding the board up in the pictures?

    Reply

Trackbacks

  1. 9 grandparent gifts YOU can make | My Family Blog says:
    December 3, 2012 at 6:52 am

    […] printable from Eighteen 25DIY photo blocks from I Heart Nap TimeSimple ornaments from Simply KiersteCount your blessing board from Lil LunaArt work candle from Come Together KidsGrandma board from I Heart Nap TimeHandmade […]

    Reply
  2. Top 10 Tutorials of 2011 says:
    March 26, 2013 at 7:58 pm

    […] 4. Count Your Blessings Board […]

    Reply
  3. DIY Mothers Day Gift Ideas says:
    April 1, 2013 at 3:47 pm

    […] {Count Your Blessings Board} […]

    Reply
  4. 20 Awesome DIY Gift Ideas - Living on Love and Cents says:
    December 19, 2013 at 1:15 pm

    […] Count Your Blessings Board  from Lil Luna […]

    Reply
  5. 20 DIY Gift Ideas for Nearly Everyone on your List! | How Does She says:
    November 4, 2014 at 5:34 pm

    […] 13.  Count Your Blessings Board. Great for grandparents! […]

    Reply
  6. Homemade Christmas – for Her | Eat Pray Create says:
    November 21, 2014 at 10:53 am

    […] 8. Count your Blessing Board!! I am gonna make one of these someday!! Tutorial found HERE. […]

    Reply
  7. 10 Last Minute DIY Gifts | 2 KASA FOX Blog Albuquerque, NM says:
    December 22, 2014 at 12:39 pm

    […] https://lilluna.com/tutorial-tuesday-count-your-blessings-board/ […]

    Reply

Leave a Reply to Janet Cancel reply

Your email address will not be published. Required fields are marked *

Primary Sidebar

I’m the mom of SIX stinkin’ cute kids and the wife to my hot hubby, Lo. My mom’s maiden name is Luna, and I’m one of the many crafty “Lil’ Lunas” in the fam.

Copyright © 2021 · Captivating Theme on Genesis Framework · WordPress · Log in